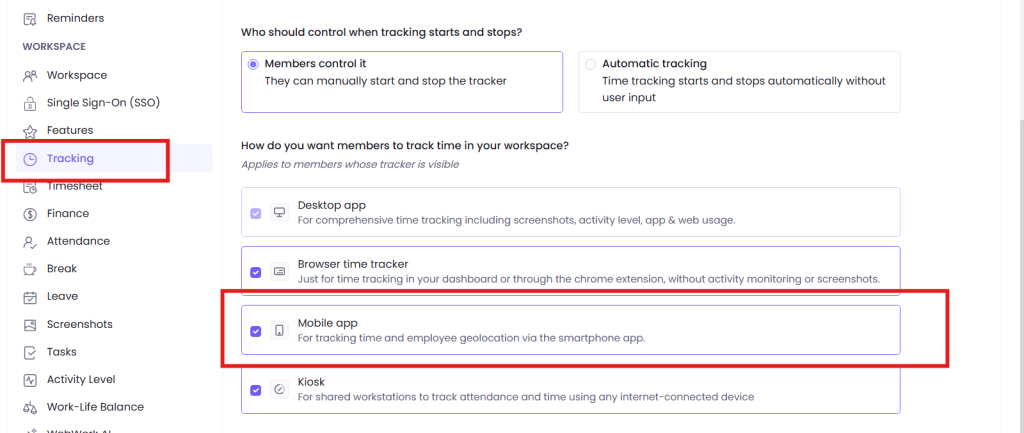
The WebWork mobile application for Android enables users to manage time tracking directly from their phone, by downloading it from the Google Play. However, note that the owner or the executive managers of the workspace should enable the Mobile tracking from their side for the users to be able to track from their mobile:
In the mobile Android application the following sections are available:
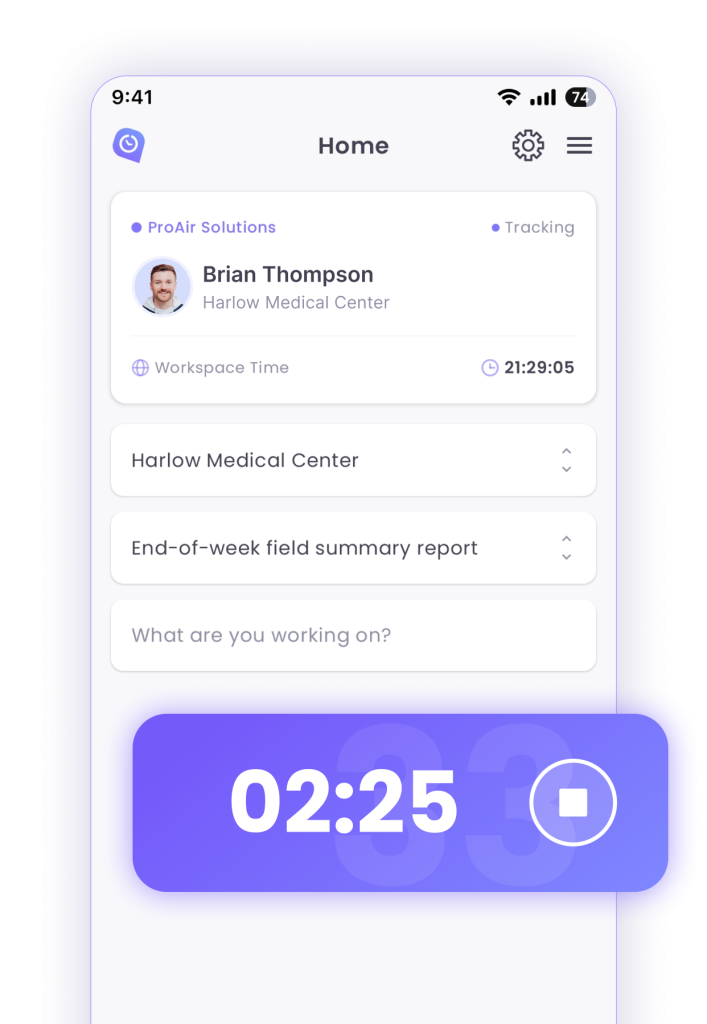
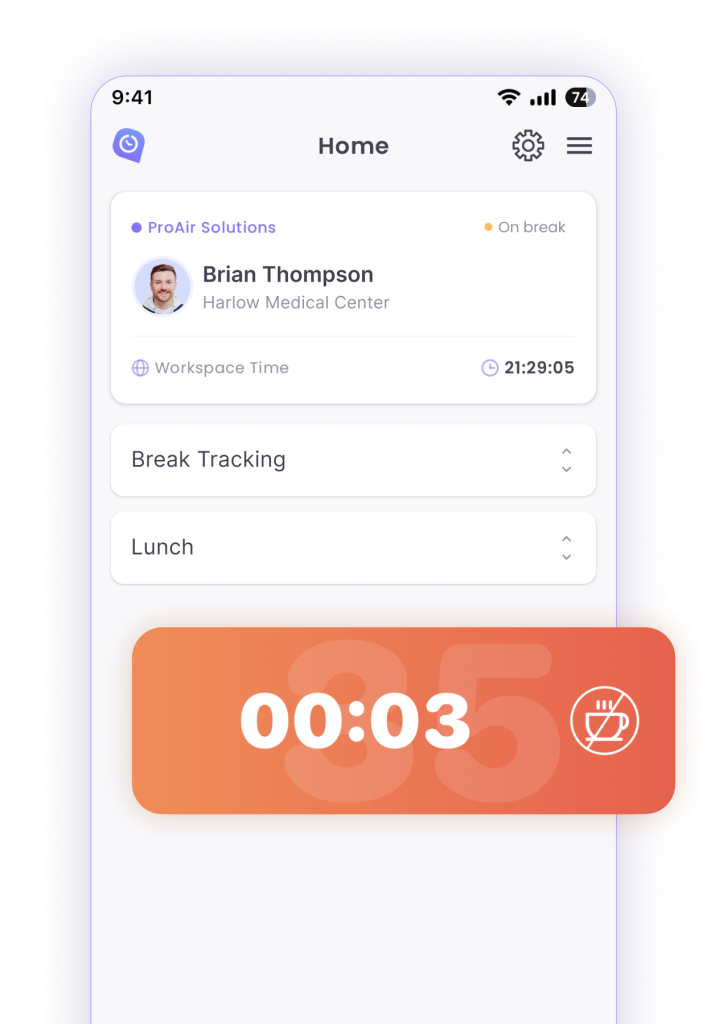
In the first section you can see information about the workspace (such as workspace name and time), the projects and tasks on which you can track time, write activity descriptions, manage your tracked time so far during the current week (if the specific project also has weekly limit it is visible as well). Additionally, if you also are tracking on another tracker (such as desktop, web or extension) you can see information regarding the tracking — which project and task the other tracker is running on. Note that in order to start the tracker on your mobile app, other trackers should be disabled. Ultimately, you can switch the tracker on by clicking on the pause button in the bottom part of your screen.
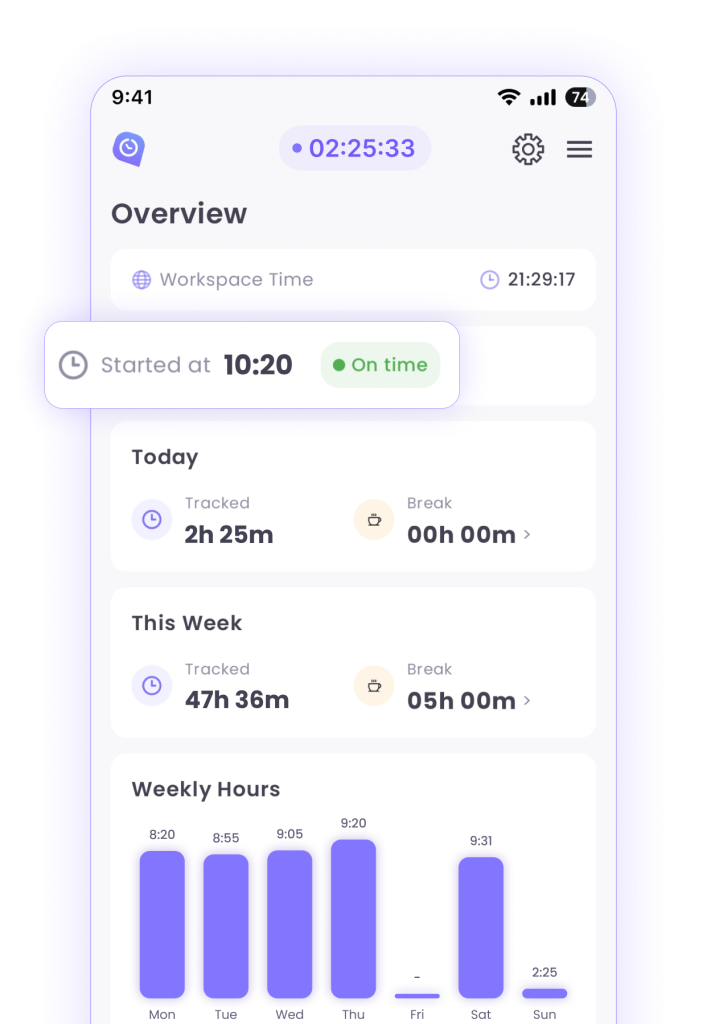
In the overview section you can see your tracked time on all devices so far for the current week and the current day. Additionally, some information is displayed about your attendance (clock-in time and status).
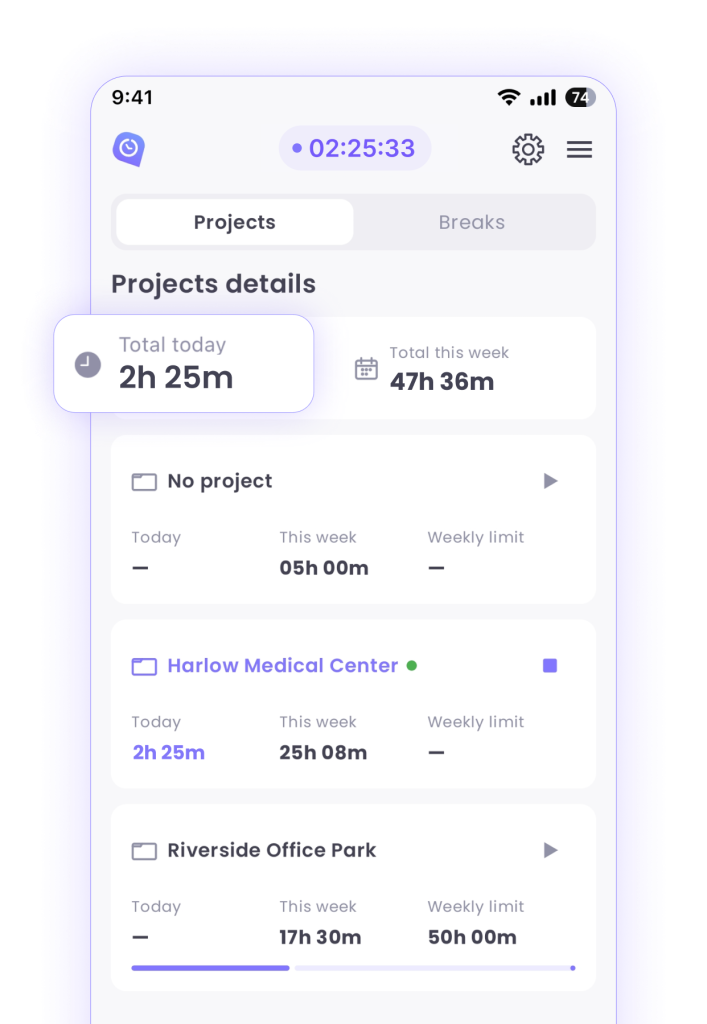
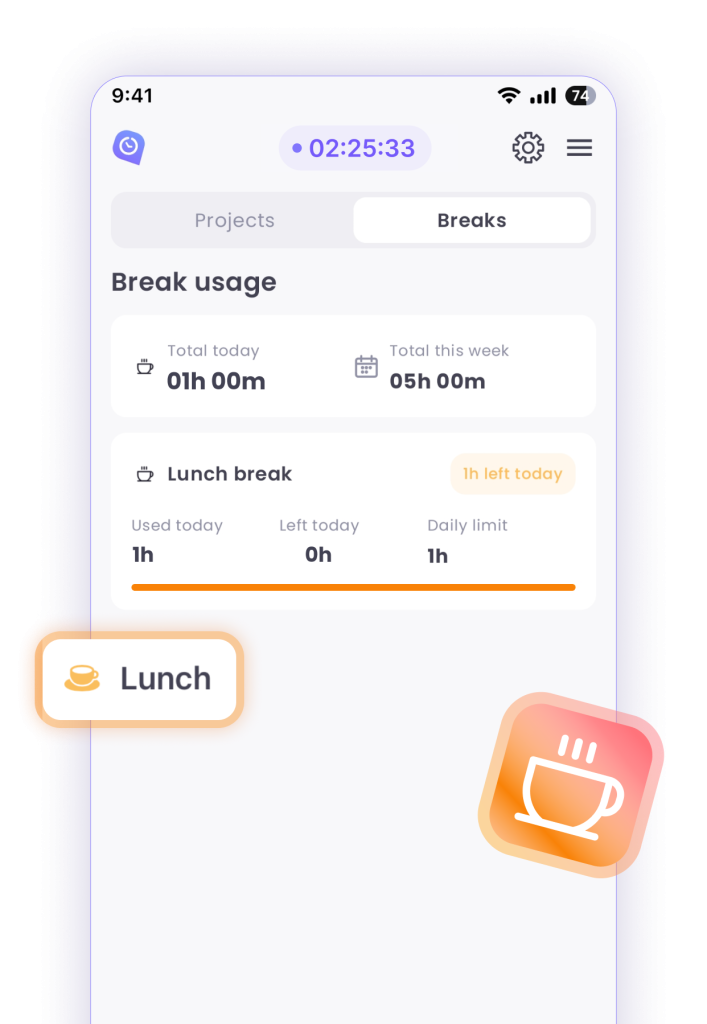
In the second section you have two view options: Projects and Breaks.
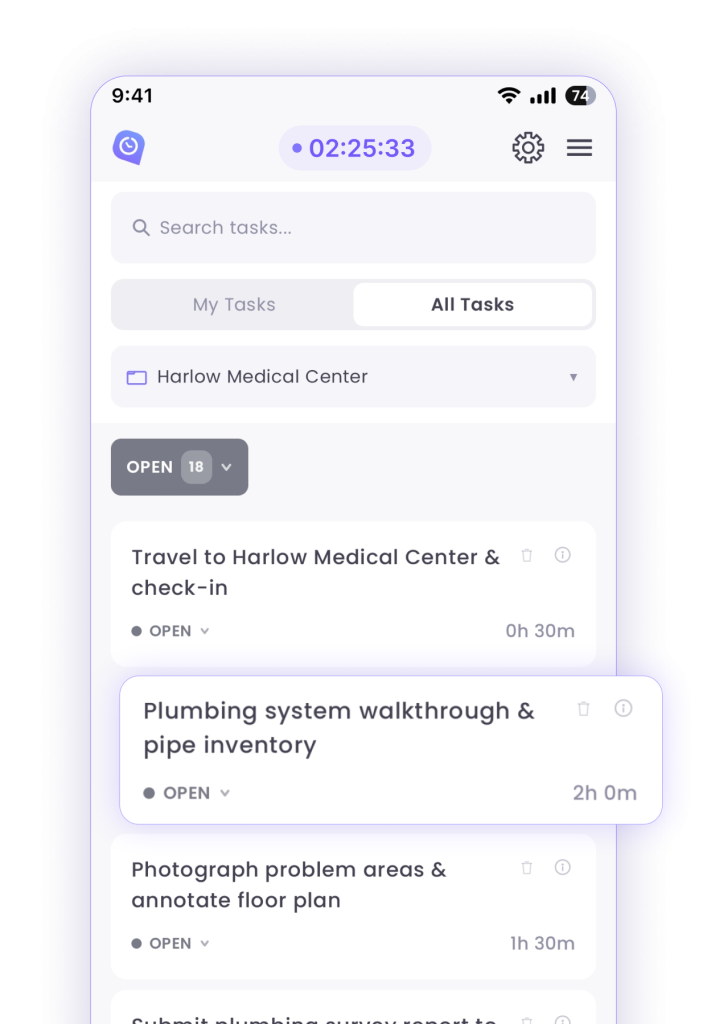
- Projects – Here yօu can see all the projects that you are assigned to and can clock on those projects and track on them.
- Breaks – This section helps to see all the break policies assigned to you and hence you can have a look at the time spent on breaks on that day or for the current week.
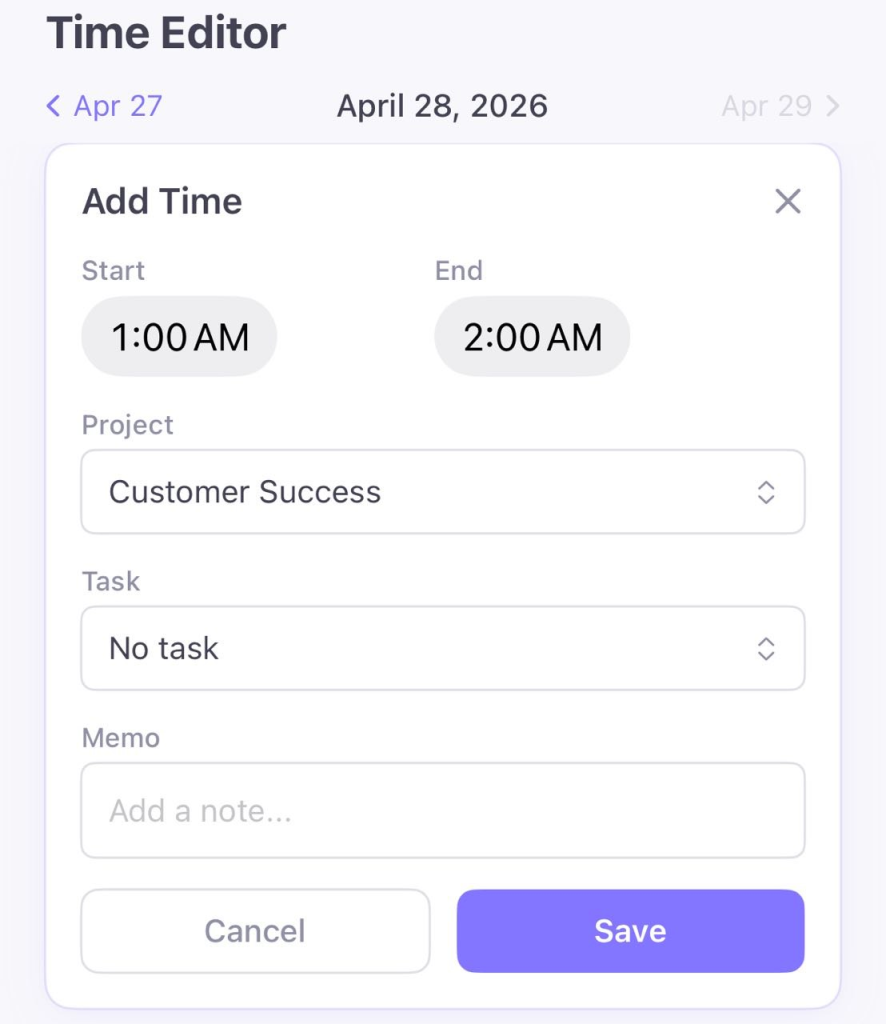
- Time Editor – Here you see the timecard of the day: session per session indication of your work. If your tracker was paused during the working day and restarted after some minutes, you can see the pause under this section. If you have permission, you can also edit or delete the time entries. Additionally, if you need to add manual time, you can do that by clicking on the Add Time button above.
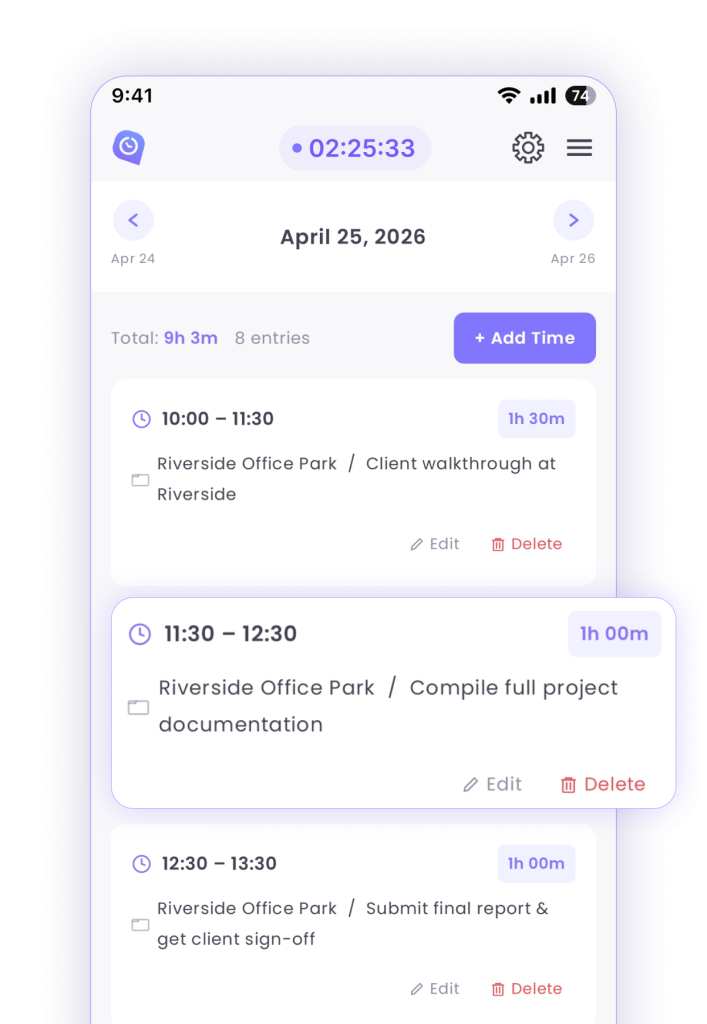
If you clicked on the Add Time button, you will have to fill the window shown in the screenshot (the time you are adding, the project and task for which you are adding the time as well as some additional notes if needed):
- Geolocation tracking
WebWork Mobile application gives opportunity to track geolocation. To switch this feature, click on Settings, then switch on the toggle Location Collection, allowing GPS data collection while tracking. Also, make sure to give permission to WebWork to access your geolocation. You should do that from your system settings.
- Other
If the device Internet connection is lost, WebWork still will continue tracking offline. Hence, no information is lost during this time, as soon as the device is back to online mode, the data is synced.
How to Check Your Tracking Status and GPS Status on Mobile
If you want to verify whether your time tracking or GPS is active on the mobile app, you can do so in just a few steps.
Step 1: Open the Menu
Tap the hamburger menu icon (three horizontal lines) in the top right corner of the Home screen.
Step 2: Access Status Options
From the menu, you will see the following options:
- Switch Workspace — if you are a member of multiple workspaces, you can use this option to switch between them and track time on the relevant one
- Refresh Data — if a recent change in your workspace is not reflecting on your end, tap this to manually refresh and pull the latest data
- Tracking Status — to check your time tracking activity
- GPS Status — to check your location tracking activity
Tracking Status
Once you tap on Tracking Status, you will see:
- Time Tracking — shows whether tracking is currently active or inactive
- Server Connection — shows whether your device is connected to the server (Online/Offline)
- Work Time Status — displays a breakdown of time tracked per project, including Server, Pending, and Offline time
- Break Time Status — displays break time split by break type
GPS Status
Once you tap on GPS Status, you will see:
- Location Permission — if denied, you will see an Enable Location Access button to grant the necessary permissions
- Workspace GPS — shows whether GPS is enabled for your workspace
- Time Tracking & GPS Recording — shows whether these are currently active
- GPS Activity — shows the last recorded location and any pending uploads
- Sent to Server — shows how many GPS data points have been successfully uploaded
Note: If GPS Recording shows as Inactive, make sure to enable Location Access and ensure time tracking is running.
Was this article helpful?
Thanks for your feedback.