
To create a task on WebWork, you first need to create a project.
When you have already created a project, follow these steps to create a task:
- Click Tasks on the left sidebar.
- Select the project you want to add a task to and click Add a new task in the top-right corner.
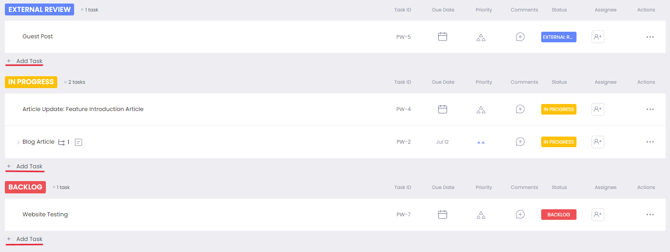
New tasks created this way will be assigned the default Open status. If you have existing tasks with other statuses, you can create new tasks by clicking Add Task in each status category. You can find these buttons under each status group.
Convert a chat message to a task
You can also convert chat messages to tasks in WebWork.
To convert a chat message to a task:
- Open the WebWork Chat by clicking the Chat icon in the top-right, or Communications > Chat on the left.
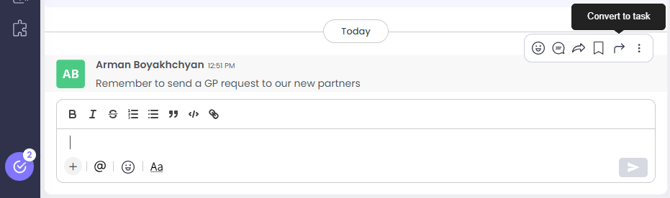
- Find the message you want to turn into a task. Hover over it on its right side and click the Convert to task icon.
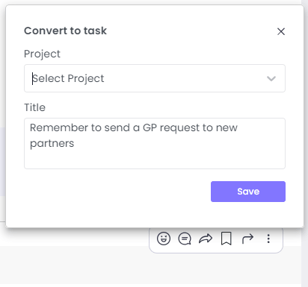
- Select which project to save the new task to from the popup window. Here, you can also modify the new task’s title. Click Save to create a task from the message.
Add task details
After creating a task, there are a couple of ways to edit its details:
- You can edit the title, due date, priority, comments, status, and assignees from the Tasks page.
- Click on a task to edit these details.
- You can also click the three-dot icon under Actions on the right and select Edit task.
Besides the above-mentioned, here you can edit the task’s description, start date, time estimate, and subtask details. You can also attach any relevant documents by clicking attach a file.
You can also add comments and reply to them under each task.
Adding the same task for all the projects
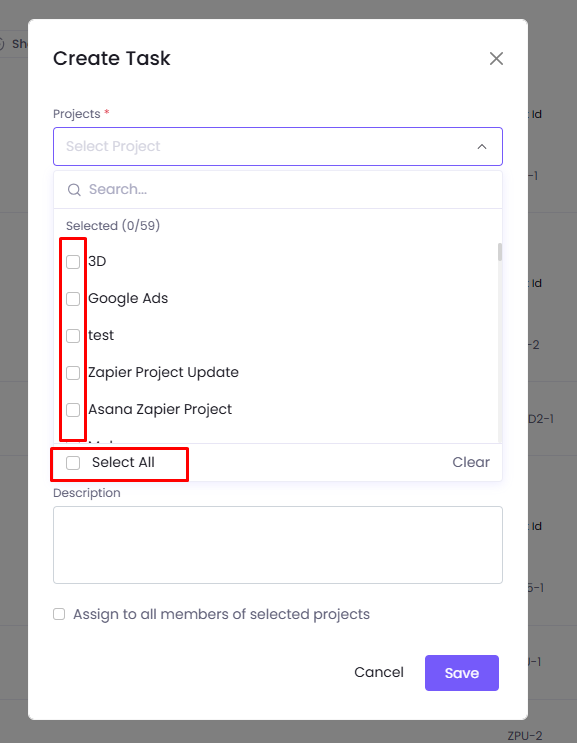
If you want to add the same tasks for many or all the projects you can do that by going to All Tasks, and then Add new task.
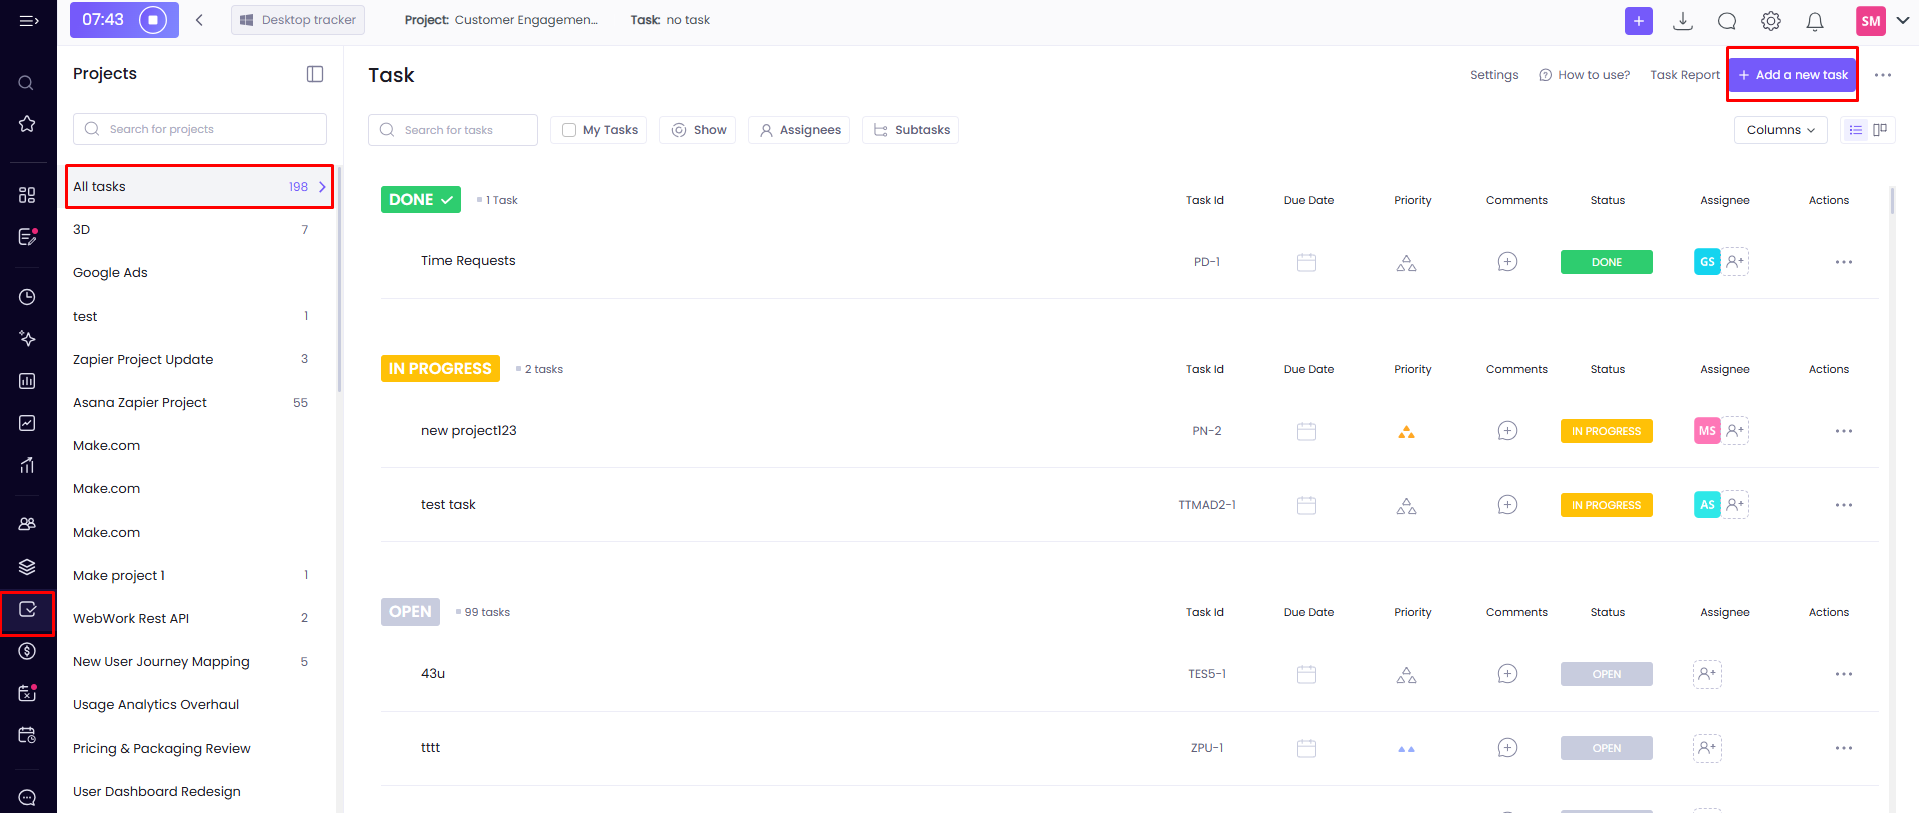
From here you can select the projects you want to create tasks for (or select all the projects) and the same task will appear in multiple projects simultaneously. Fill in the rest of the information and save it. You can also assign them to all members of the project.
You have different filters to view you tasks:

- My Tasks – You will see all the tasks assigned to you
- Active Statuses – You will see all the tasks with the active statuses only
- Show – You can select which specific task statuses to show
- Assignees – You will see the tasks assigned only to the selected members
Add custom fields
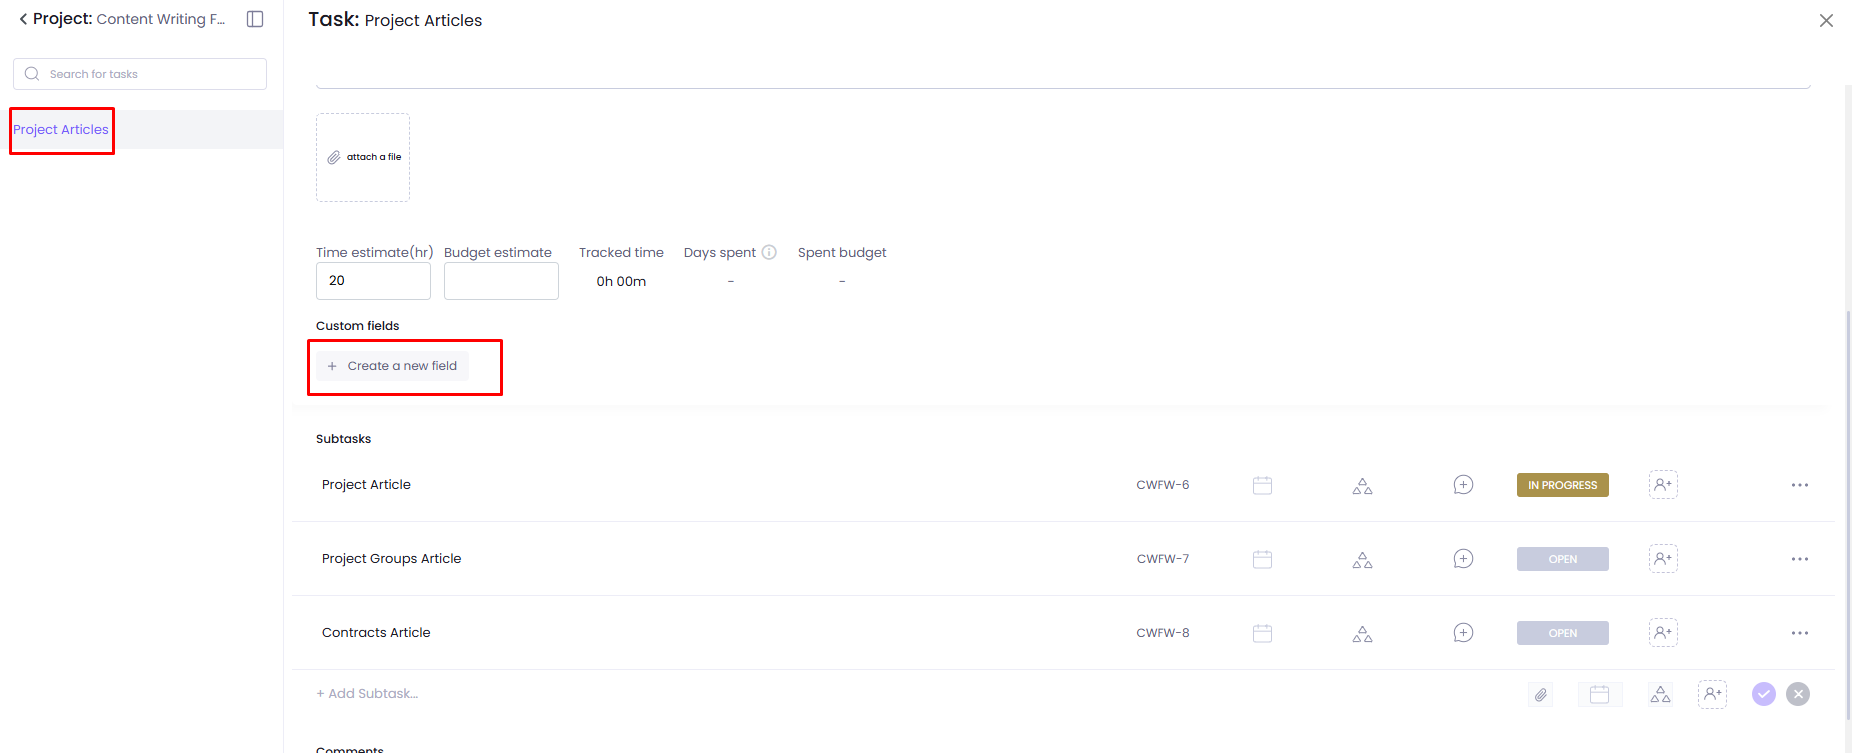
You can also add custom fields to your tasks, if you feel like it will be necessary to include all the information about the task description in that way. To do that click on the Create a new field button while creating the task. To do that click on the Create a new field button while creating the task.
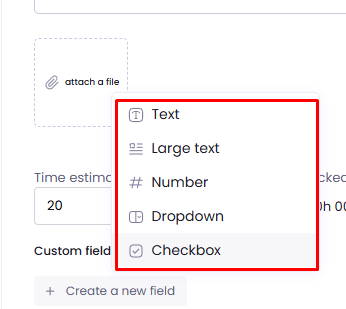
After clicking on it you can decide whether you want the field to be a text field, number, dropdown, or a checkbox. By creating the field it will appear in all the tasks that exist in your workspace, not just this one specific task.
To know more about Custom Fields go to the following article: Custom Fields Article.
Attach and Record Voice Notes
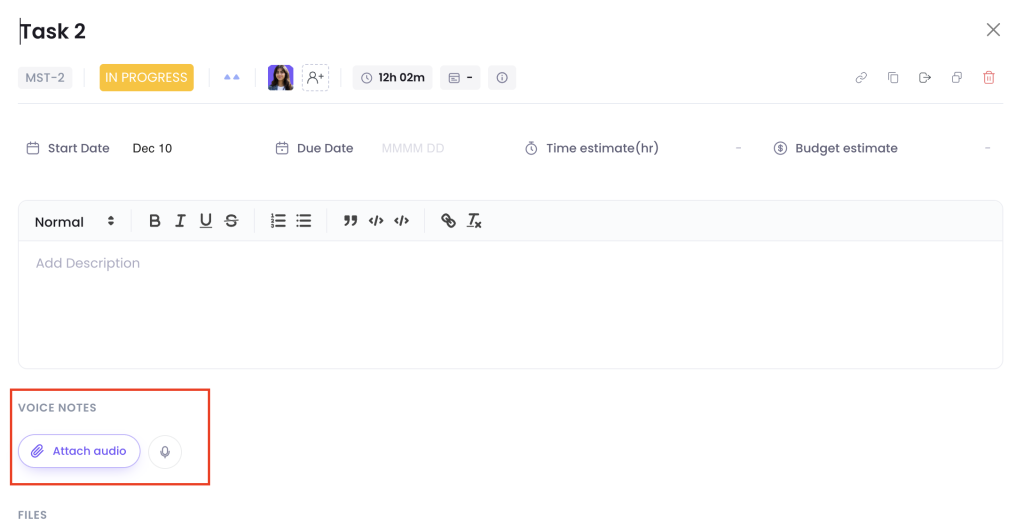
You can attach pre-recorded voice files or record voice notes directly within the task detail page. Voice notes can be added to the task itself or to individual task comments. This provides a faster, more natural way to communicate context, instructions, and feedback without leaving the task view:
Set a task to recur
Any task can be set to repeat on a schedule instead of only running once. To set up recurrence, open the due date picker for a task. This works from list view, kanban view, or from the task detail page. Click Set recurring at the bottom of the calendar.
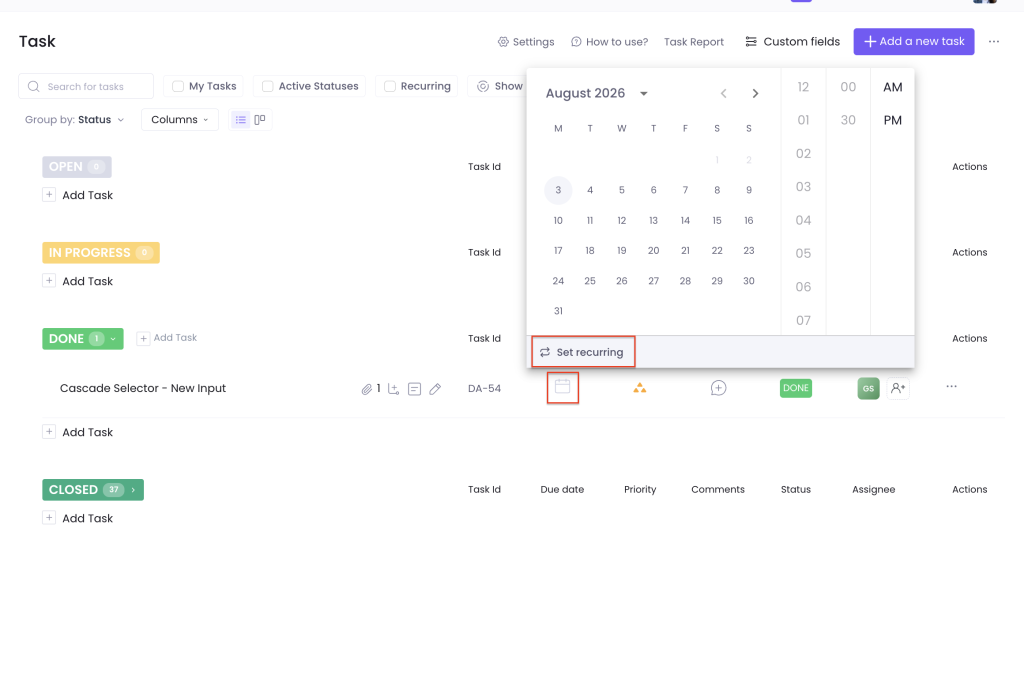
This opens the Recurrence panel, where you can configure:
- Frequency — how often the task repeats: Daily, Weekly, Monthly, Yearly, or a custom interval. For daily recurrence, you can also check Skip weekends to avoid creating tasks on Saturdays and Sundays.
- Trigger — whether the next occurrence is created On Schedule (the next task appears on its due date regardless of whether the current one is finished, and completing the current one early creates the next one right away) or only on completion of the current task.
- Create new task — whether each recurrence generates a brand-new task, or instead updates the existing task in place.
- Recur forever, or set a specific repeat count / end date if you’d rather have the recurrence stop after a certain point.
- Update status to — automatically set the task to a chosen status each time it recurs.
- Sync recurrence to due date — keep the recurrence schedule aligned with the task’s due date if it changes.
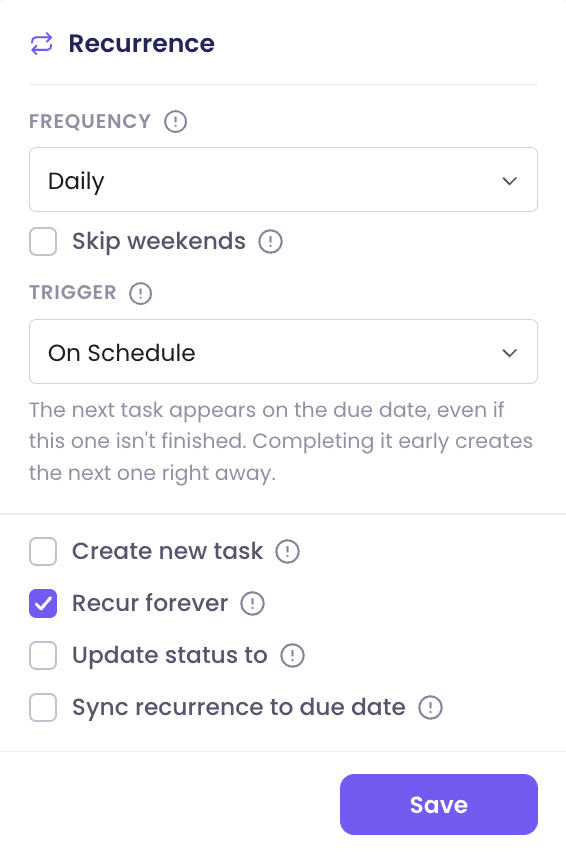
When a new occurrence is created, its start and due dates carry forward automatically, preserving the same gap between them as the original task.
Click Save to apply the recurrence settings.
AI Features in Tasks
WebWork’s task system includes built-in AI tools that help you create tasks faster, write clearer descriptions, estimate effort, and get quick answers about your work without leaving the task you’re working on. Look for the sparkle icon (✦) throughout the task interface. It marks every place where AI assistance is available.
Create a Task with AI
Instead of filling in every field manually, you can describe the task in plain language and let AI create it for you.
- Open your task list and find the Add a new task button at the top of the page.
- Click the sparkle icon next to it. Hovering over it shows the tooltip Create a task with AI.
- In the Create a task with AI window, type a description of the task you want to create in the text field. For example: “Fix the layout shift on the mobile Home page after first login, high priority, assign to the mobile team.”
- Click Generate.
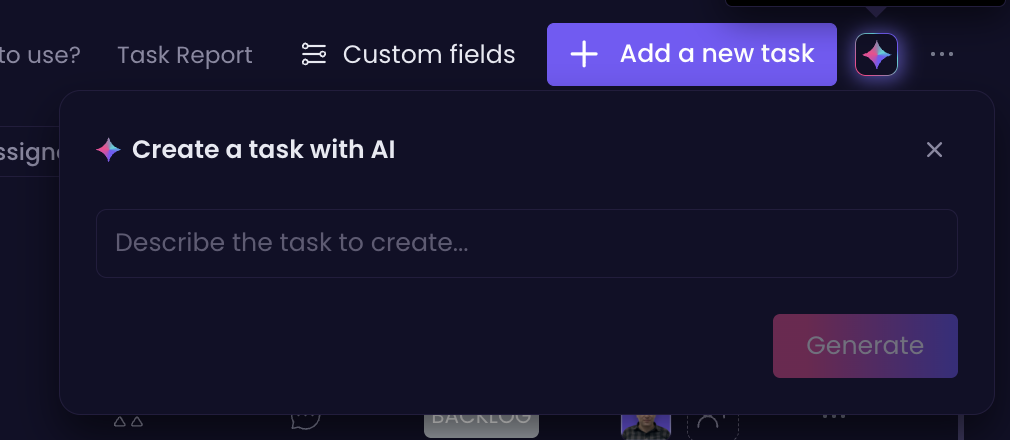
AI will turn your description into a structured task. Review the generated task before saving and adjust any details as needed.
Tip: The more context you include in your description, such as the problem, the expected outcome, and who it’s for, the more complete the generated task will be.
Estimate Time with AI
If you’re not sure how long a task will take, AI can suggest a time estimate for you.
- Open the task and locate the Time estimate (hr) field.
- Click the sparkle icon next to the field label. Hovering over it shows the tooltip Estimate with AI.
- AI analyzes the task and fills in a suggested estimate in hours.

You can always edit the suggested value manually if it doesn’t match your expectations.
Accurate estimates make it easier to compare planned effort against actual tracked time and to plan your team’s workload.
Polish Task Descriptions with AI
The Polish feature improves the wording and structure of your task descriptions, so your team gets clear, easy-to-follow instructions.
- Open the task and click into the description editor.
- Write or paste your description as usual. It doesn’t need to be perfect.
- Click the Polish button in the top-right corner of the editor toolbar. Hovering over it shows the tooltip Polish with AI.
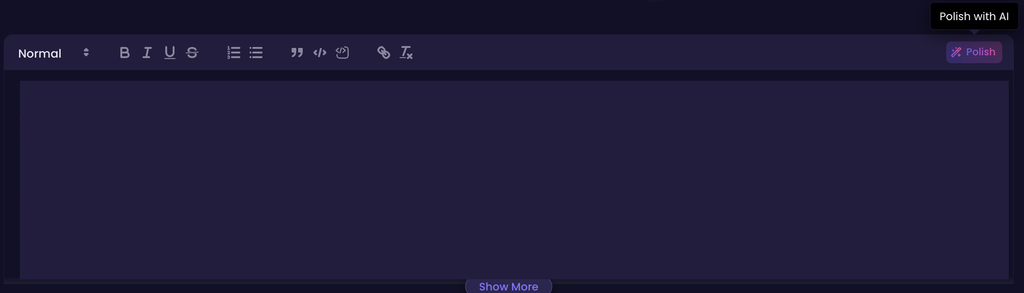
AI refines the text for clarity, grammar, and readability, and can organize it into clear sections. This is especially useful for bug reports and technical tasks, where a consistent format, such as Problem, Expected Result, and Steps to Reproduce, helps developers understand and resolve issues faster.
Review the polished version before saving to make sure all important details are preserved. If you haven’t yet typed any task description, AI will generate an approximate description based on your task name.
Ask AI About a Task
Ask AI opens an AI assistant that understands the context of the task you’re viewing and can answer questions, summarize information, and take actions for you.

To open it, click the Ask AI button. The assistant panel opens with a personalized greeting and a list of suggested actions.
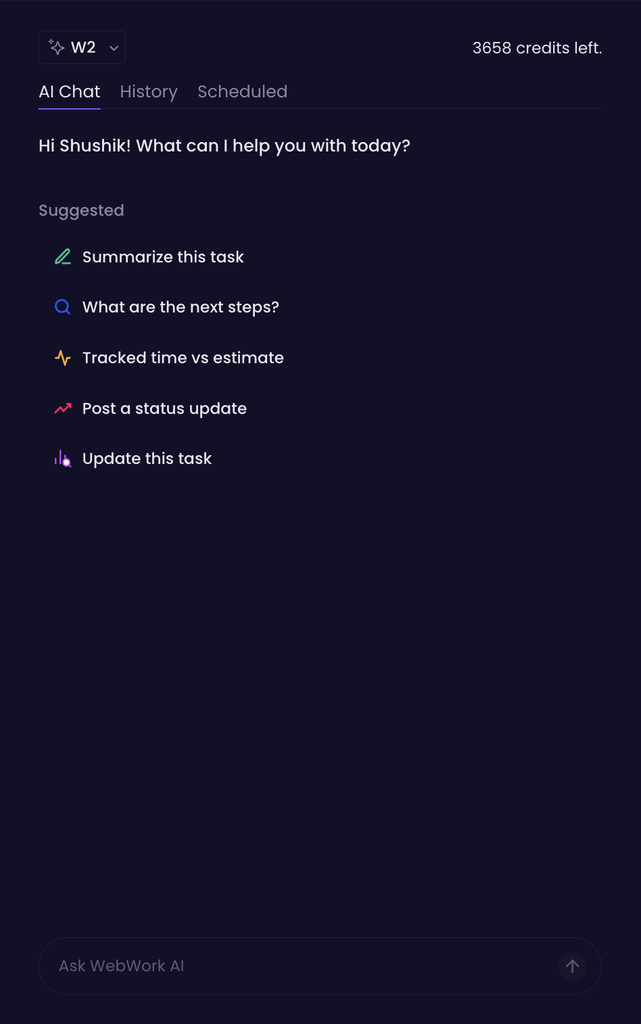
Suggested actions
For quick results, click one of the suggested prompts:
- Summarize this task: Get a short overview of the task, its description, and its current state.
- What are the next steps?: Get suggestions on how to move the task forward.
- Tracked time vs estimate: Compare the time already tracked on the task against its time estimate, so you can see whether the task is on schedule.
- Post a status update: Have AI draft and post a status update on the task.
- Update this task: Ask AI to make changes to the task’s details.
You can also type your own question or request in the Ask WebWork AI field at the bottom of the panel and press the arrow button to send it.
Good to Know
- AI features are available on the Pro plan and above.
- Each AI action consumes one credit. This applies to every AI feature: creating a task, estimating time, polishing a description, and each request made through the Ask AI assistant.
- You can check your remaining credits at any time in the top-right corner of the Ask AI panel.
- AI-generated content is a starting point. Always review generated tasks, estimates, and descriptions before relying on them.
Tasks can be viewed on a calendar instead of only as a list. Each task appears on its due date, so the shape of the month is visible at a glance, and tasks that have no due date are collected in an Unscheduled sidebar on the right rather than being left out of the view.
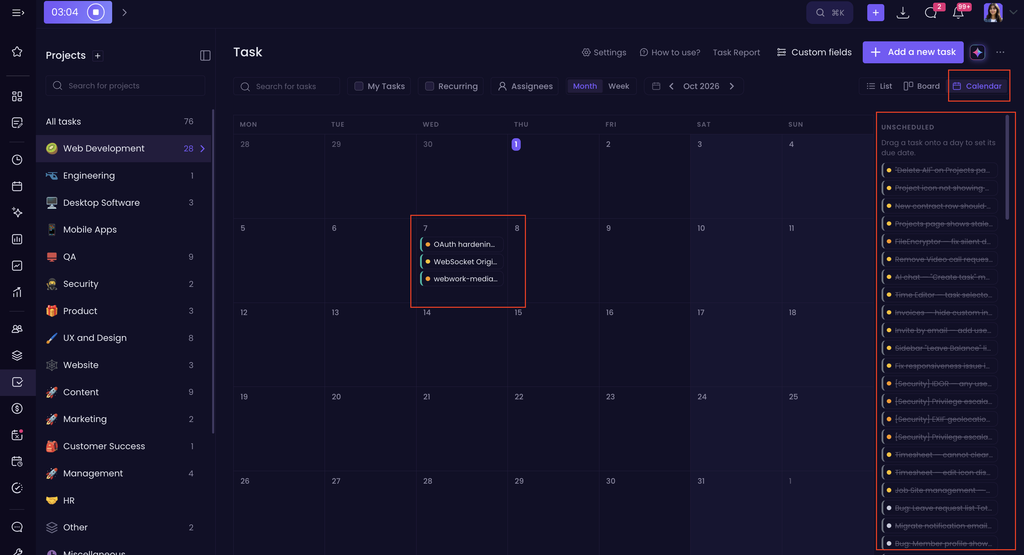
Creating a task from the calendar is a single click on a day, and the due date is set to that day automatically.
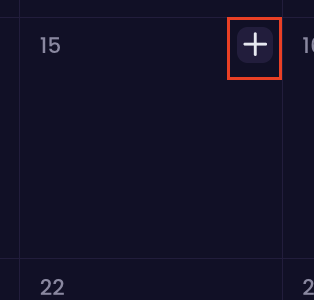
This makes it easier to see where work is concentrated, to spot days that are overloaded, and to schedule tasks that were never given a date.
Was this article helpful?
Thanks for your feedback.