On WebWork, you can create two types of invoices: custom and hour-based.
On a custom invoice, you have to enter details manually. While the hour-based invoice is already based on worked hours.
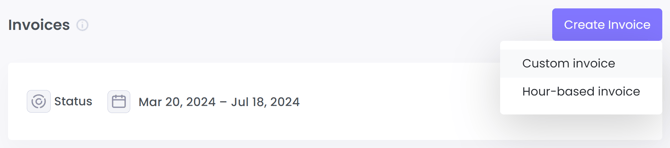
To create a custom invoice
- In your dashboard, go to Finances > Invoices
- Click Create Invoice in the top-right
- Choose Custom invoice in the drop-down menu
On the Create Invoice page, you can enter the details of your invoice, including:
- Date: the creation date of the invoice
- From: the details of the invoice creator, including name, email, and address
- Bill to: the details of the invoice addressee—your workspace or a customer
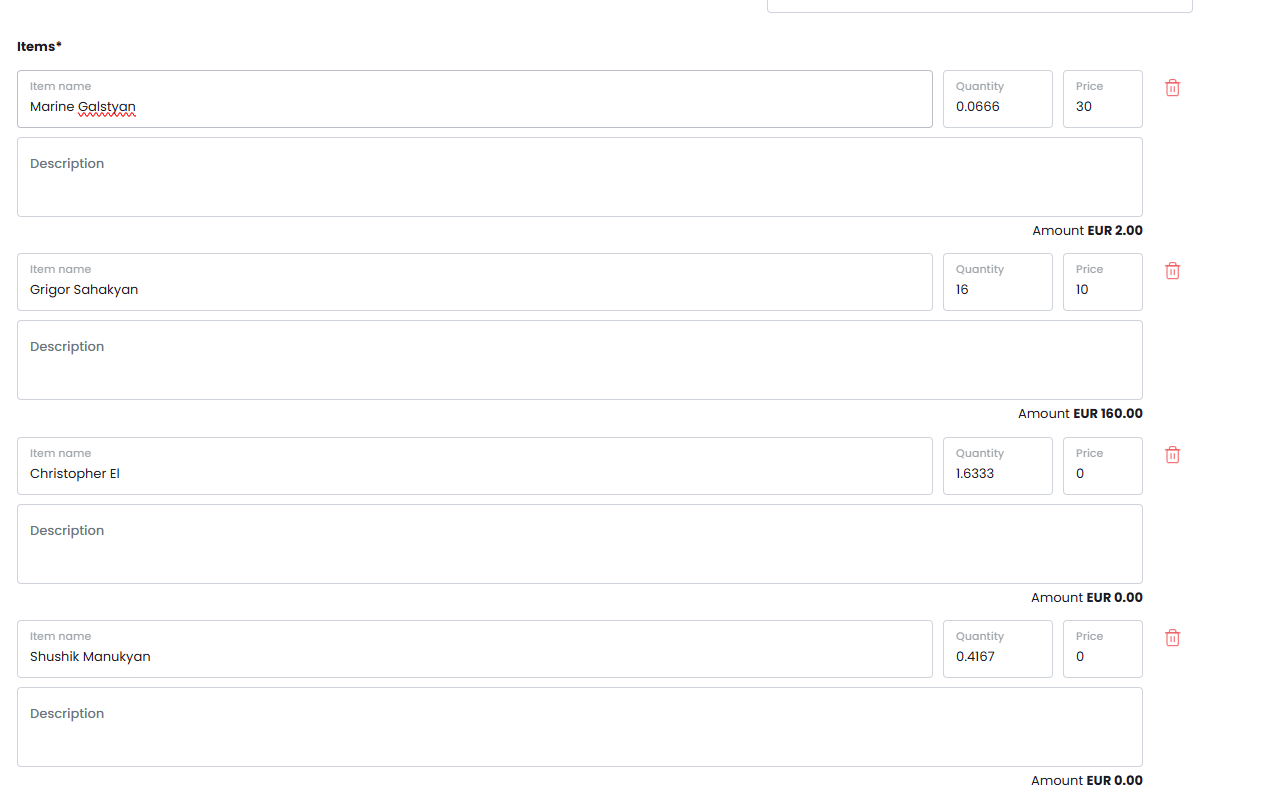
- Items: the details of the invoice’s payable items, including description, quantity, and price
You can toggle additional settings for the invoice in the top-right of the Create Invoice page. These include:
- Notes: if you want to add a note at the bottom of the invoice
- Accept Payment: if you want to make the invoice payable. When you enable this function, the customer will be able to pay with a click directly from the invoice.
Accept Payment is available only on Plus and Premium plans. On Pro plan, you can get it as part of the Online Payment Add-On with $1.5 per user/mo.
Note: to use the Accept Payment feature, you need to connect a Stripe payment profile to your WebWork account.
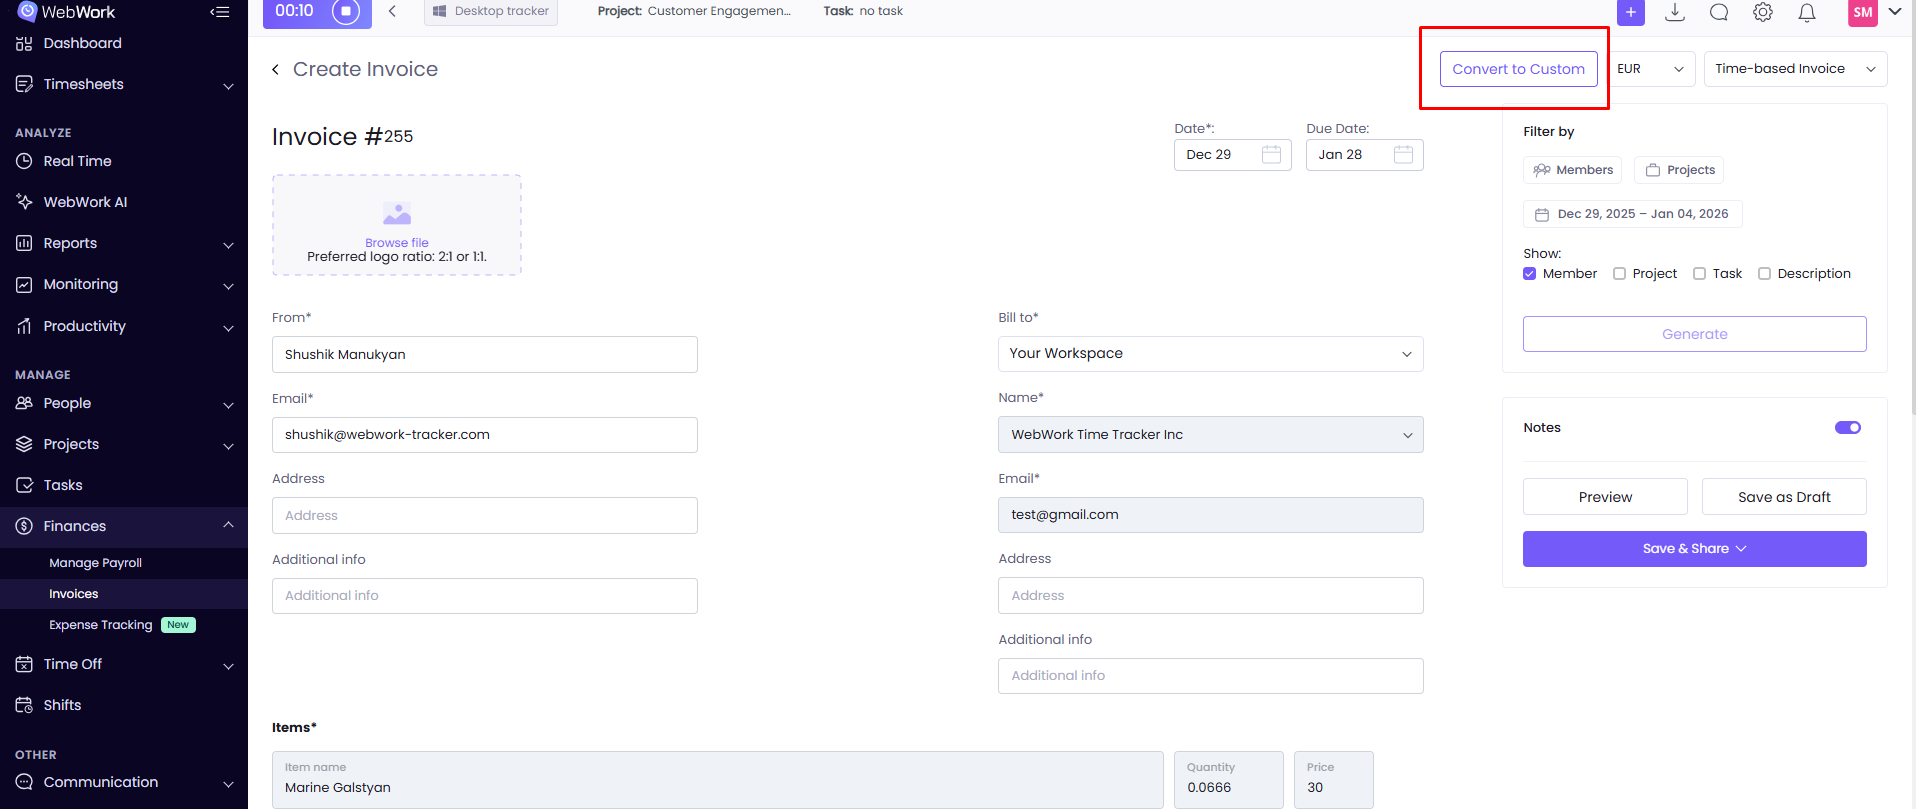
Generating an hour-based invoice
Hour-based invoices allow you to bill your customers for the amount of hours you or your team worked for them.
To generate an hour-based invoice,
- In your dashboard, go to Finances > Invoices
- Click Create Invoice in the top-right
- Choose Hour-based invoice in the drop-down menu
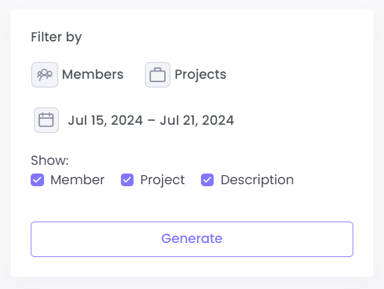
On the right of the Create Invoice page, you can select several filters to generate your hour-based invoice. This includes:
- Members
- Projects
- Date
Note: If you leave the Members and Projects filters blank, all members and projects of the selected date will be added automatically. The Date filter will be automatically set to This Week.
After selecting your filters, click Generate to create your invoice. You can check the Member, Project, and Description boxes to add them to the invoice for adding more information.
Viewing your invoices
To view your invoices:
- In your dashboard, go to Finances > Invoices
Here you can see all of your invoices and their key details, including:
- Date
- Bill to
- Total amount
- Status
You can filter your invoices by their Status. These include:
- Draft
- Pending
- Marked as Paid
- Paid
You can also filter invoices by date to see invoices created in a set date range.
Editing the status of an invoice
After creating or generating an invoice, you can click Save as Draft on the right of the Create Invoice page to assign the Draft status to it. If you click Save & Share and choose a sharing option, the invoice will be marked as Pending.
If the customer pays an invoice through WebWork, it will be marked as Paid. If they pay outside of WebWork, you can assign it a Marked as Paid status manually.
Invoice Customers or the Workspace Owner
In the invoice creation page, you can select who you want to invoice—a Customer or the Workspace Owner of WebWork.
Customers are not active members of WebWork. You add their information for the mere purpose of invoicing them.
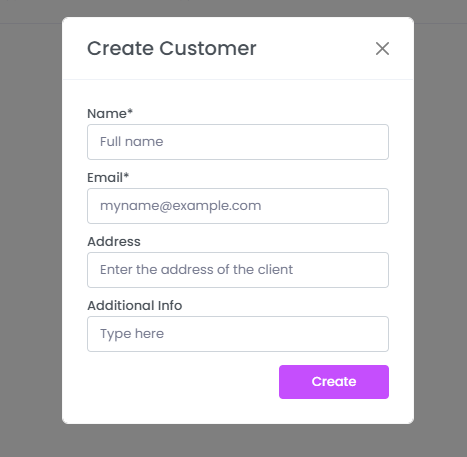
You can add a customer directly from the invoice generation page by clicking Add Customer in the customer field or by going to People>Customers.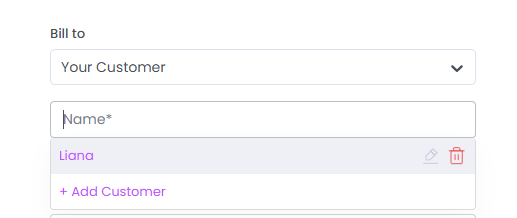
Invoices for Workspace Owners will appear on the Payments page.
Convert To Custom Option
Additionally, there is an option to convert an hour-based invoice to a custom invoice, allowing you to make changes to it. Since item names, quantities, and other details cannot be edited in hour-based invoices, converting it enables you to modify these fields. To access this feature, click the Convert to Custom button:
This allows you to make changes to the item-related fields.
Was this article helpful?
Thanks for your feedback.