How to set an hourly rate for a project?
To set an hourly rates for a project:
- In your dashboard, go to Projects>Projects
- Click the name of the project or click the three-dot icon under Actions and click Edit Details
- Enable the Billable toggle and click Save Changes
- Click Properties and enter an amount under Hourly rate
Permissions of different member types
The Workspace Owner and Executive Managers can enable the Billable toggle and set hourly rates for all projects. Team Managers can set hourly rates only for the projects of members they manage, though they cannot change the Billable option of any project.
To make any finance-related changes, managers will need to have their Show hourly rate toggle turned on in Members>Billing. To enable this:
- Go to People > Members
- Click the three-dot icon under Actions and click Edit details
- Click Billing and enable the Show hourly rate toggle
Note: In WebWork there are different types of rates based on purpose. Those are pay rate (the amount used to calculate employee earnings within the workspace), and bill rate (the amount used to generate invoices and charge clients for the work performed).
Choosing how a rate change will take effect
When changing hourly rates, the tracker will ask whether to:
- Change the hourly rate starting from a certain date in the past or the future
- Change the hourly rate for all past and future time entries
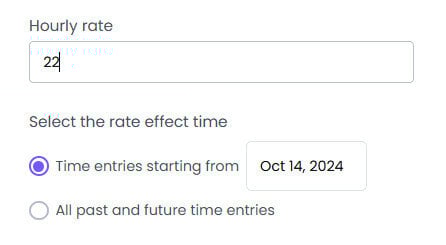
Use the second option with care, as any reports or invoices you’ve generated previously will be affected with the change.
Rate History
After setting all the necessary parameters about the project’s rate, you can view their rate change history later, if you are a Plus or a Premium user. To view the rate history you should select the project you want to review the rate for and go to Properties. You will see a table at the bottom.
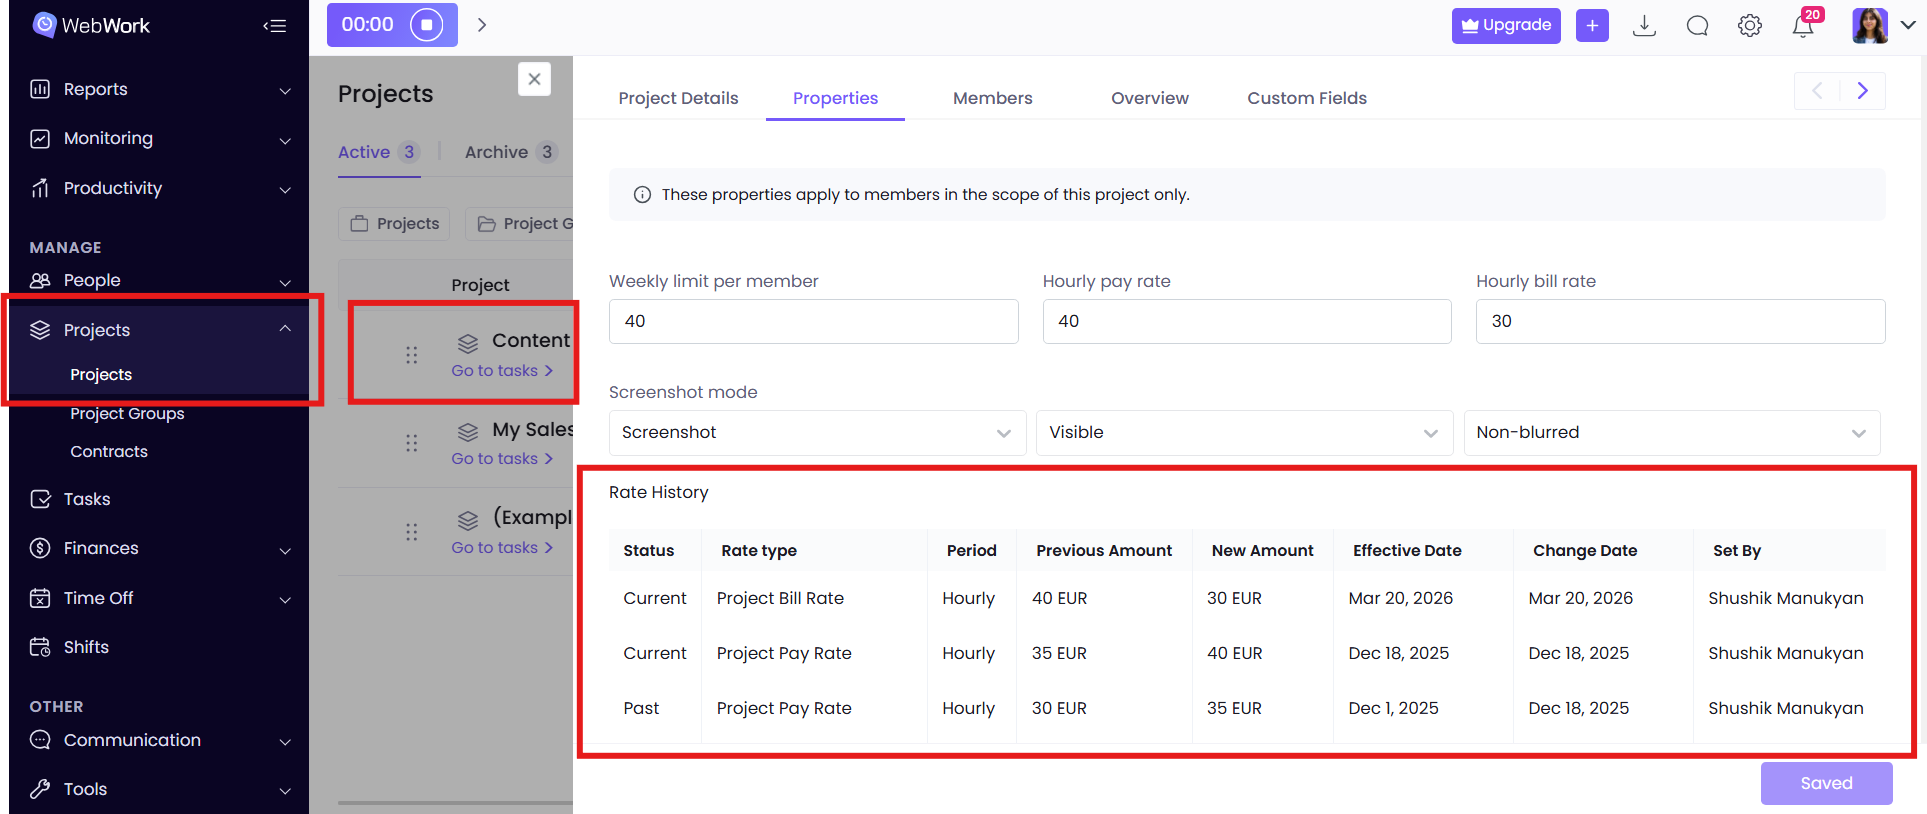
As you can see from the table at the bottom, it gives you data about:
- Status – Whether the change made is active (Current), or is no longer active (Past),
- Rate Type -Under the Rate Type column you will see Project Rate, because the rate here refers only to projects. Those can be either project bill or pay rate, depending on which one you changed.
- Period – What pay period was affected. In this case the changes were made on the member’s Hourly Rate.
- Previous and New Amount – These are the columns that show how much the difference was before and after the change.
- Effective Date – This column gives information about the date from which the calculations should be adjusted based on the new rate.
- Change Date – This indicates the date when the change was made. Note that the Effective Date and Change Date may be different: you can change the rate with the intention of recalculating from an earlier date.
- Set by – This column shows who implemented the rate change for the member.
Was this article helpful?
Thanks for your feedback.