On WebWork, you can create two types of invoices: custom and hour-based.
Custom Invoices
To create custom invoices,
1. Go to Finances>Invoices>Create Invoice>Custom invoice
2. Fill out the required fields
3. Under items, you can fill out the service your are billing the client for
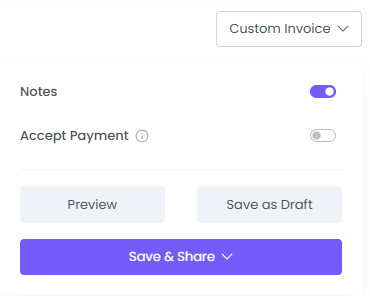
Before saving, on the right side panel, you will see Notes and Accept Payment
Enabling Notes will add a notes field where you can write anything you want, to express gratitude or else.
Enabling Accept Payment will include a link in the invoice itself which the client can use to pay you directly. Note that you need to connect your Stripe account to WebWork to be able to activate this setting.
4. Click Save & Share and select the option to share—as a link, via email, or download PDF.
The Accept Payment setting is available to Plus and Premium plans. To access it on the Pro plan, you can enable the Online Payments add-on in Settings>Finances at $1.5 per user/mo.
Hour-Based Invoices
To create hour-based invoices,
1. Go to Finances>Invoices>Create Invoice>Hour-Based Invoice
2. Fill out the required fields
3. Click Generate
4. Enable Notes and Accept Payment (explained above)
5. Click Save & Share and select the option to share—as a link, via email, or download PDF.
For Hour-Based Invoices, fields such as Item Name, Quantity, and Price are automatically populated based on the hours tracked in the system and cannot be edited.
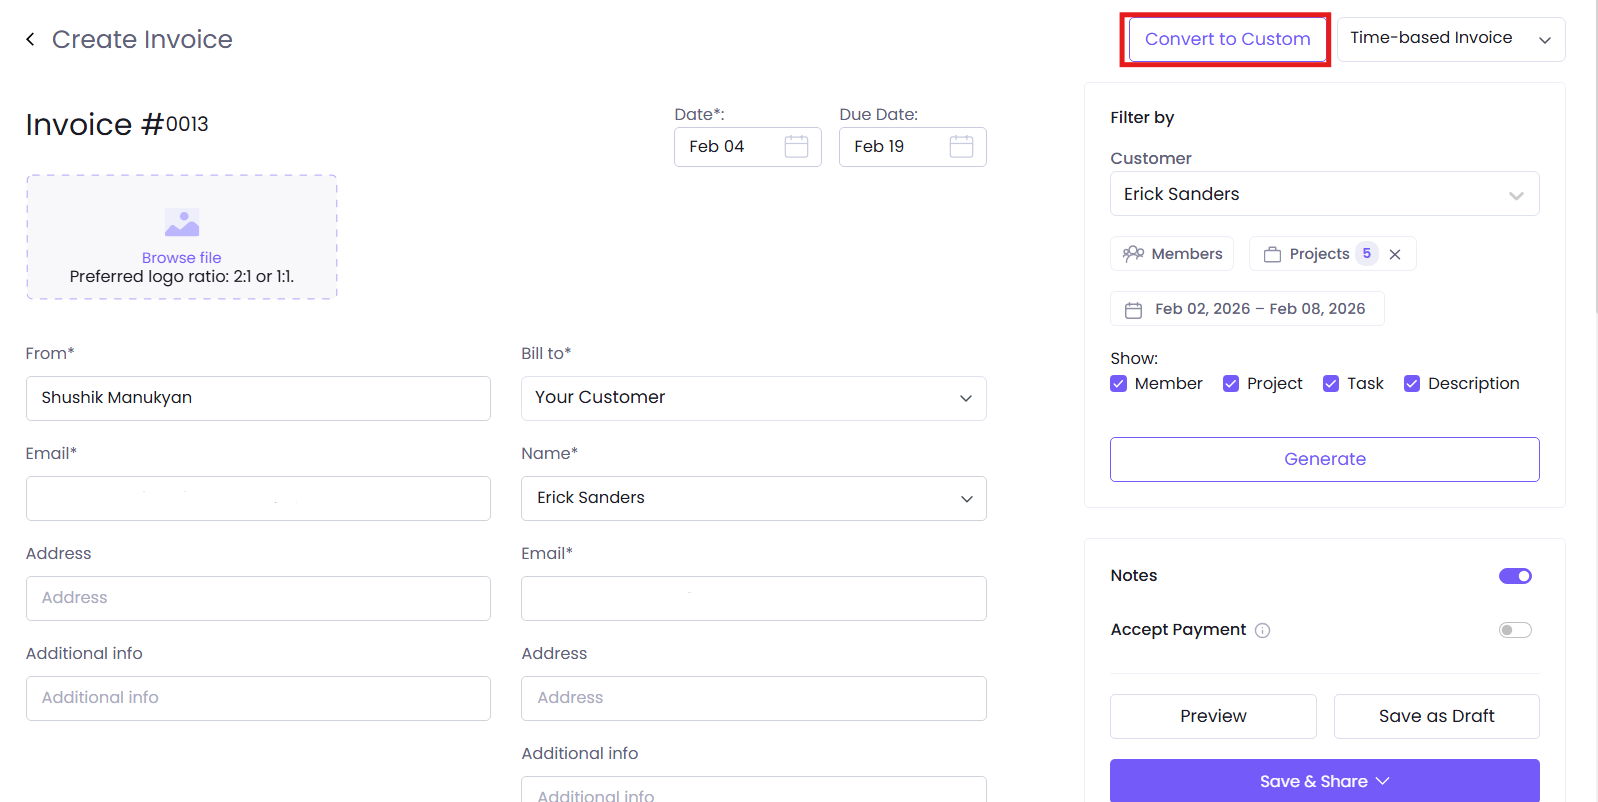
Convert to Custom
If you have created an Hour-Based Invoice and need to make changes, you can click Convert to Custom. This allows you to edit the invoice that was automatically generated.
Automatic Invoice Creation
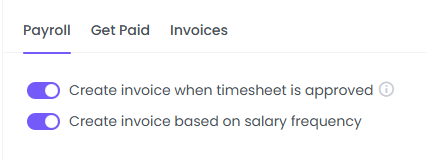
You can set to have invoices created automatically in two cases: when a timesheet is approved and when it’s time to pay the set fixed salary.
Timesheet Approval
To enable automated invoice creation based on approved timesheets, go to Settings > Finance > Payroll tab > Create invoice when timesheet is approved
Fixed Salary
To get automatic invoices created based on set fixed salary, go to Settings > Finance > Payroll tab > Create invoices based on salary frequency
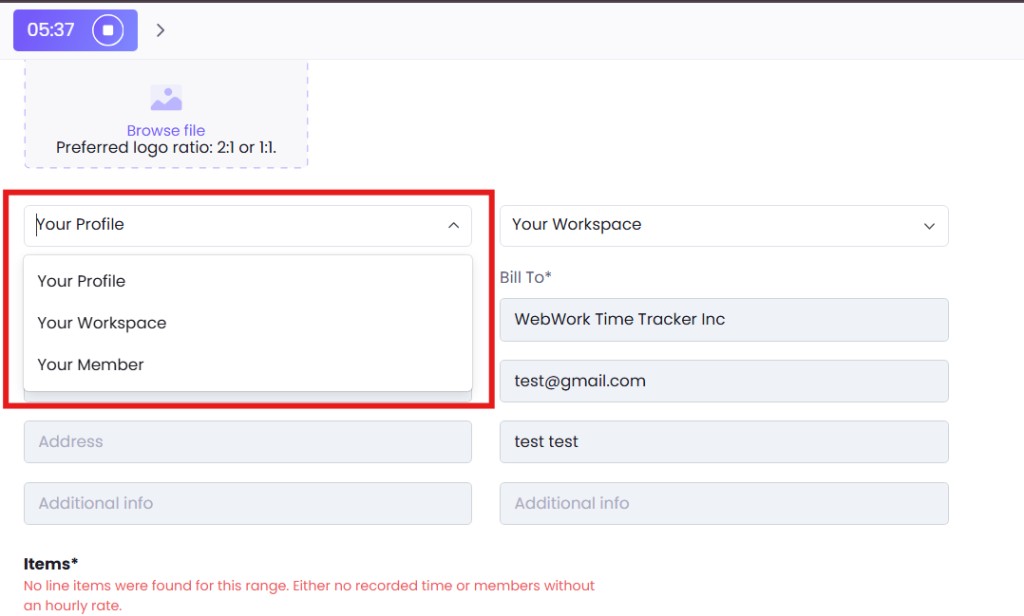
If you are an executive manager or the owner of the workspace, you can edit the From —> To section from your side, being able to generate invoices. You can have an invoice:
- from your profile billed to the workspace or the client
- from the workspace billed to the client
- from your member billed to the workspace or client (if you do not want to request the employee to create an invoice from their side)
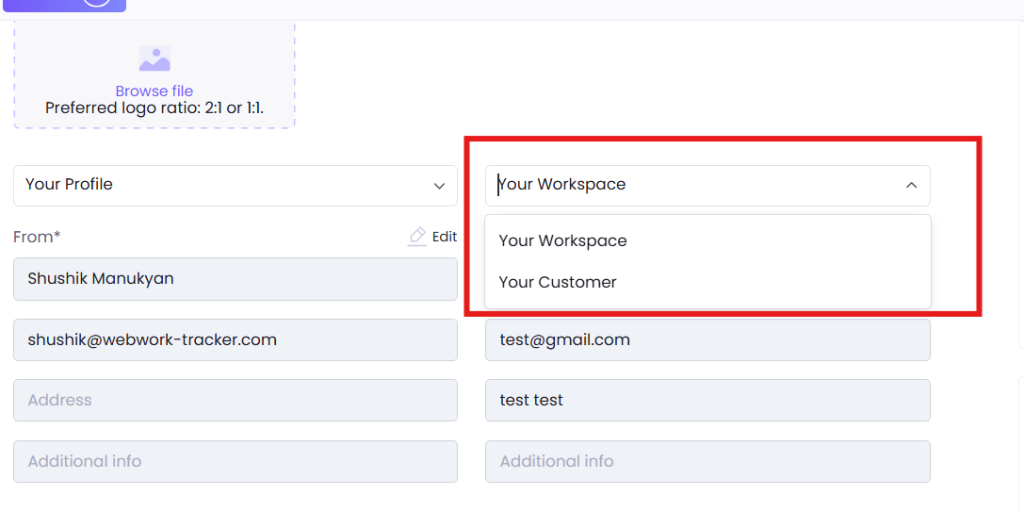
This will be possible to configure even if you have selected Time-based invoice instead of Custom. For this, you should select the correct billing person/entity (either your profile, your workspace or your member):
Then, also set the entity/person you’re billing accordingly, from the field next to it:
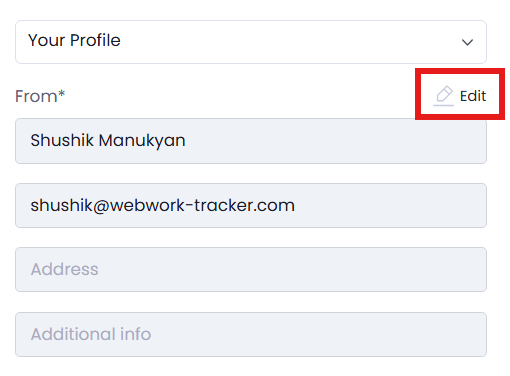
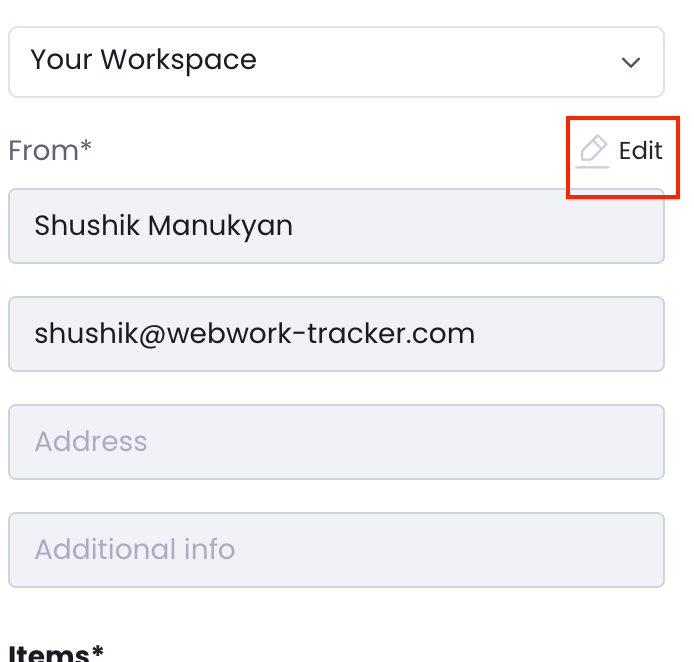
Additionally, you can also edit the biller’s information by clicking the Edit button:
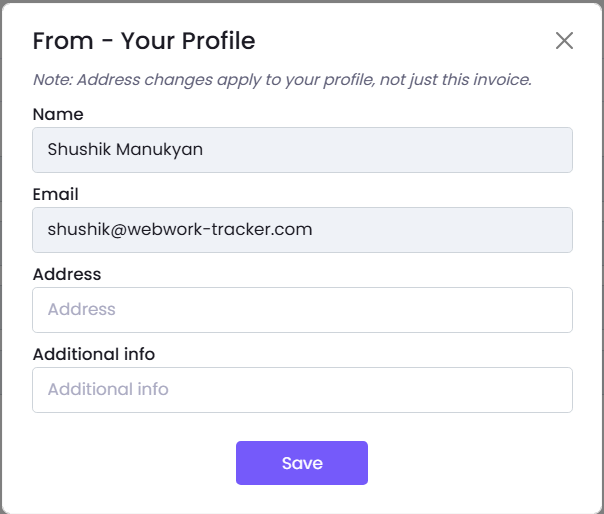
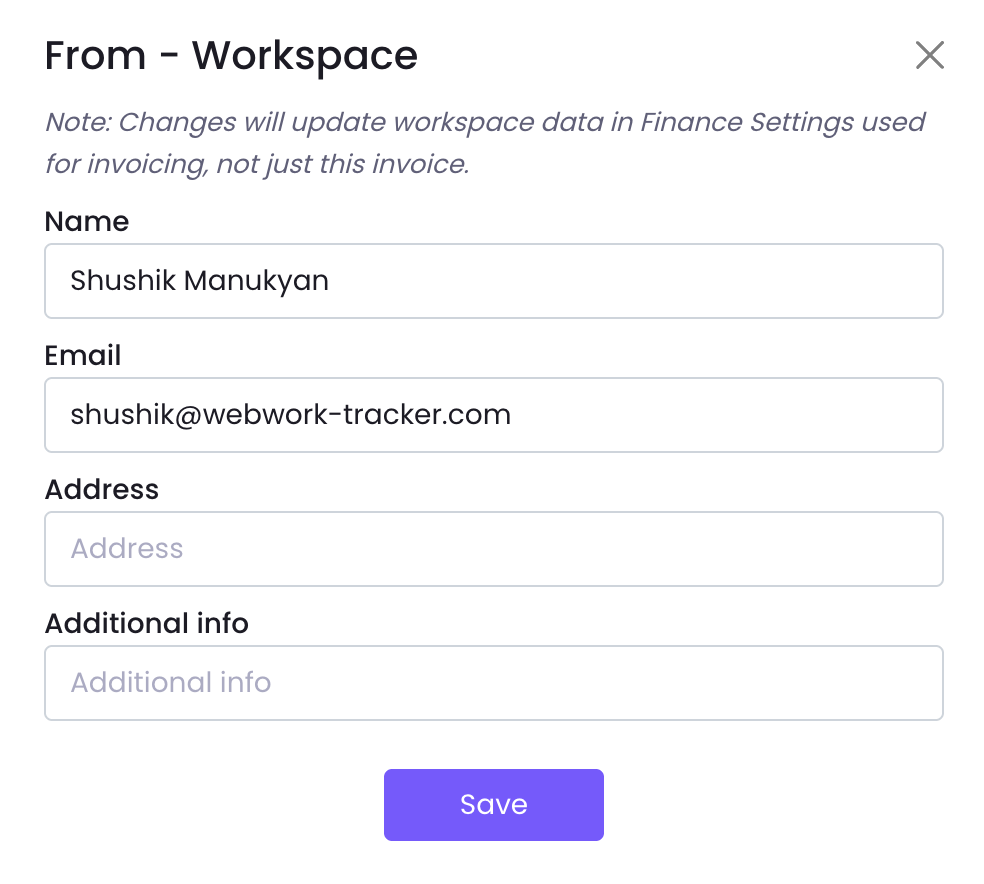
When you click on Edit, this window appears, where you can fill in the name, surname, email address, as well as other address and information:
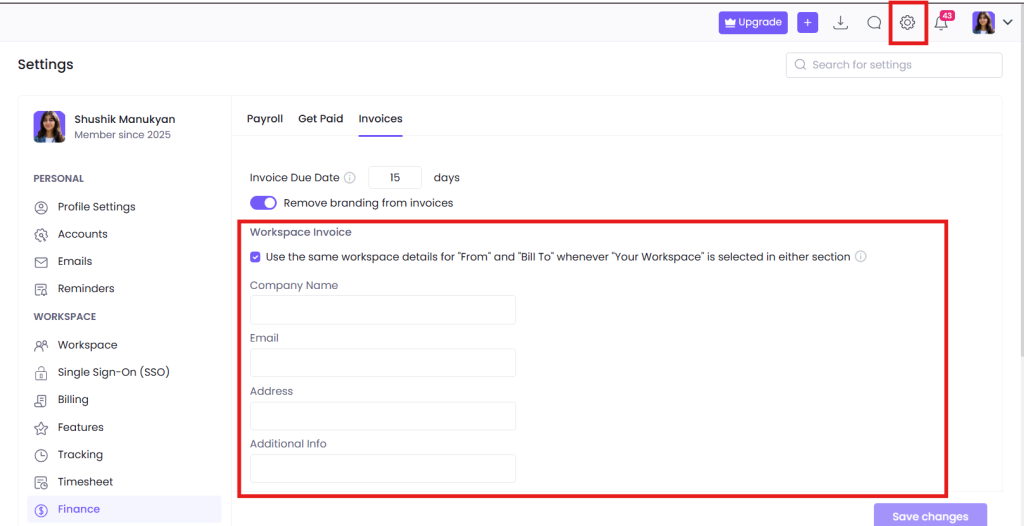
By default, your invoice workspace information is pulled from your workspace name and owner email. If you’d like to use different details, you have two options:
- Edit the invoice directly — Click edit on the invoice and update the workspace information manually. This is only available to the workspace owner, and any changes will be reflected for all members in the workspace.
2. Set it up in your settings — Enable workspace information in your settings so it auto-fills in the From or Billed To fields whenever you select Workspace. By default, both fields will use the same information, if you’d like them to differ, simply uncheck the relevant field in your settings.
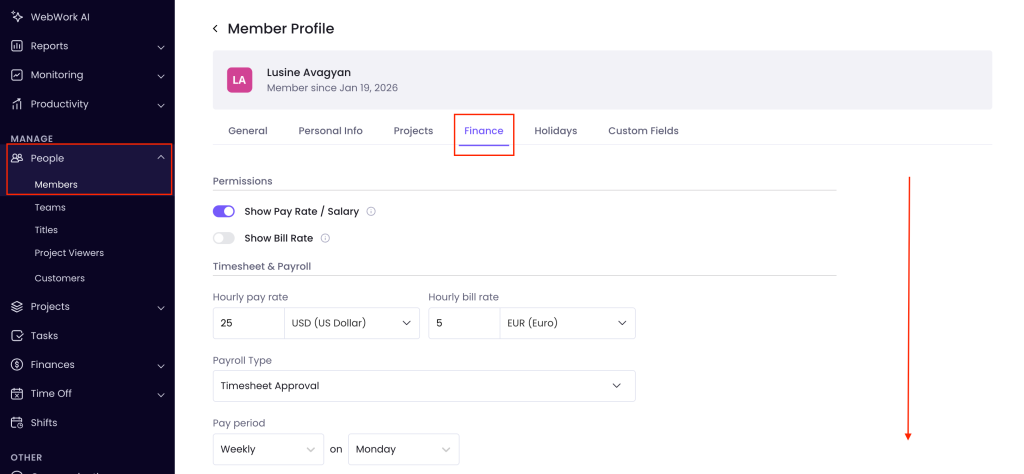
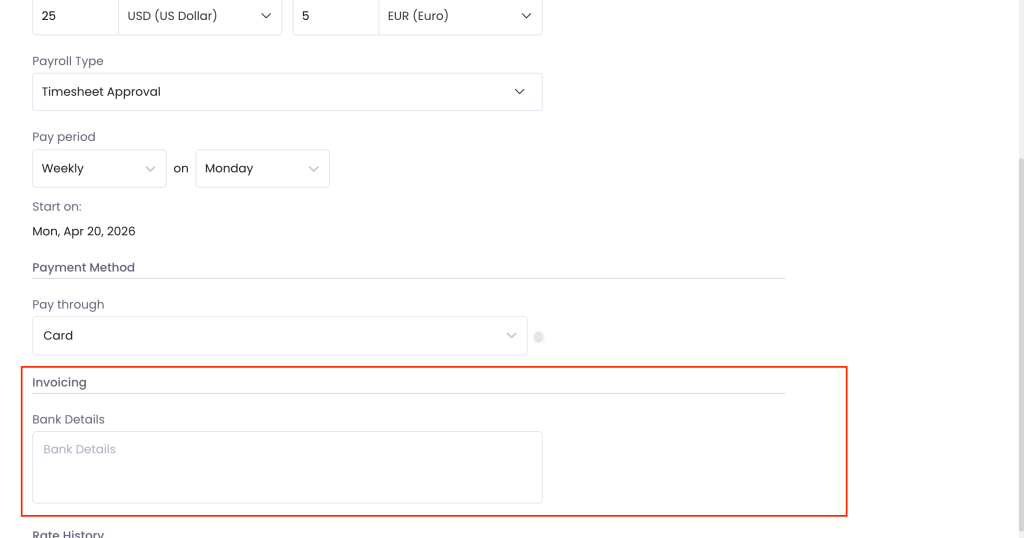
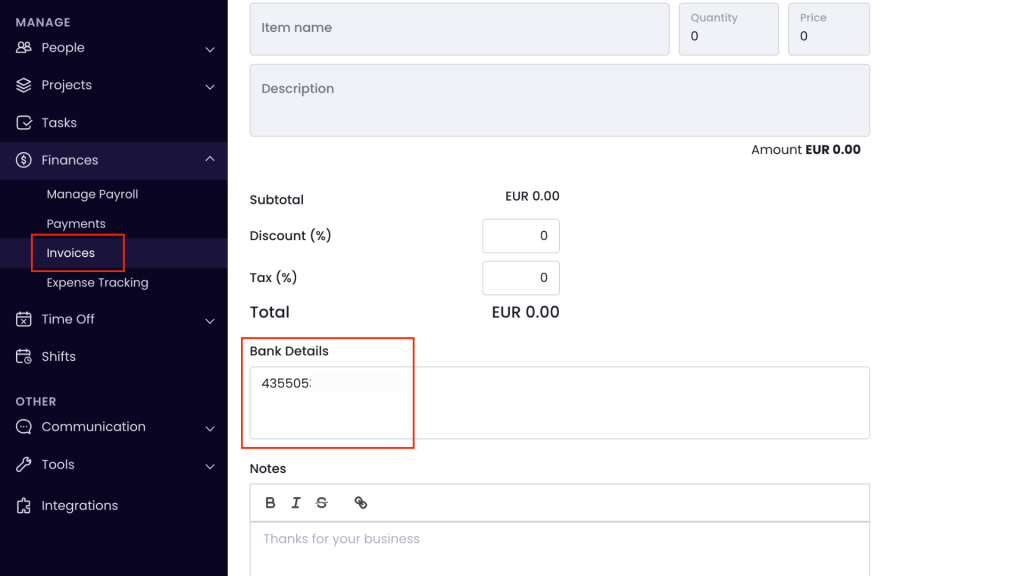
You can also add a member’s bank details in the Members → Finance section. Once saved, these details will automatically appear in the invoice whenever that member is selected:
Invoices to the customers
Our invoice automation extends to cover customer billing too. For this, you can also enable the bill rates for specific projects, members or contracts. Read more about our bill rating system here.
To enable automated invoice creation based on approved timesheets, go to Settings > Finance > Payroll > Create billable invoices when timesheet approved

Once enabled, approving a timesheet will automatically trigger invoice generation; no manual steps are needed. The system identifies which clients the team member logged hours for, splits the time accordingly, and generates a separate invoice for each client based on the tracked hours. This means if a team member worked across multiple clients during the same period, each client receives their own invoice reflecting only the hours relevant to them.
This works alongside the existing payroll automation, the same timesheet approval that generates invoices for paying team members can now also handle customer billing at the same time. Admins can enable this from the billing settings, and the rest is handled automatically.
Was this article helpful?
Thanks for your feedback.