To create a workspace in WebWork, follow these steps:
- Sign up and take the onboarding steps, like writing your workspace name, selecting your industry, team size, and so on
- Select which time tracker you want workspace members to use: Visible, Silent, or Visible & Silent (Visible tracker is accessible by members and they can control it, while the Silent tracker is not visible and is managed only by you, the Visible & Silent version allows you to select which workspace members should have the Visible and which the Silent tracker)
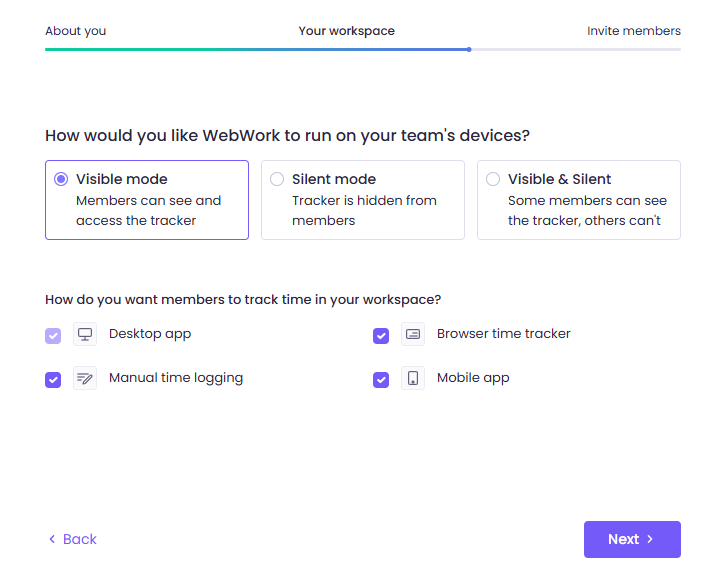
Note that to get screenshots and track activity and app usage, workspace members should install the Desktop App. If you use the Silent Desktop App, you should install it on company devices. Learn how to install the Silent Desktop App here.
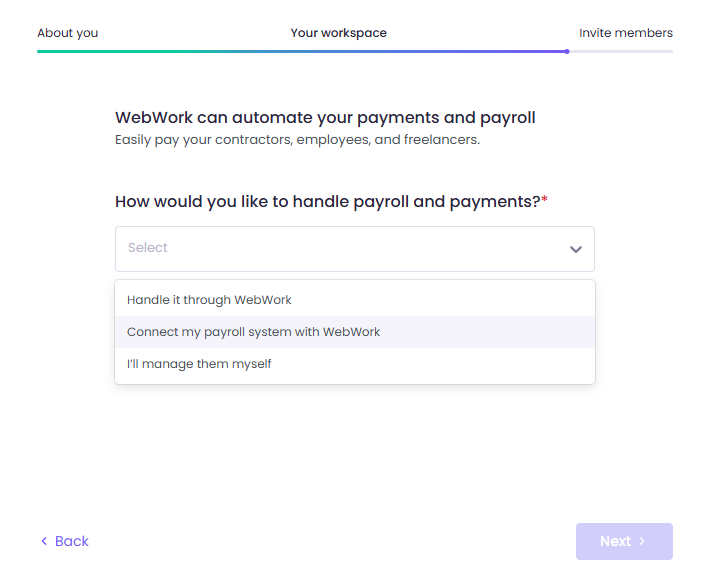
3. Select how you prefer to handle payments (whether through WebWork, that is with card, PayPal, Remote, Bitwage, or Xero, or connect your payroll system)
4. Invite 5 or more members or attach your card to get 20% off

5. After finishing the onboarding, follow the setup steps to invite members, add projects, and download the tracker, depending on the type
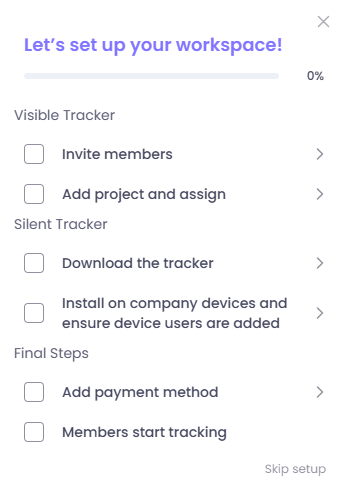
6. Finish setting up your workspace by adding a payment method and making sure the members start tracking time
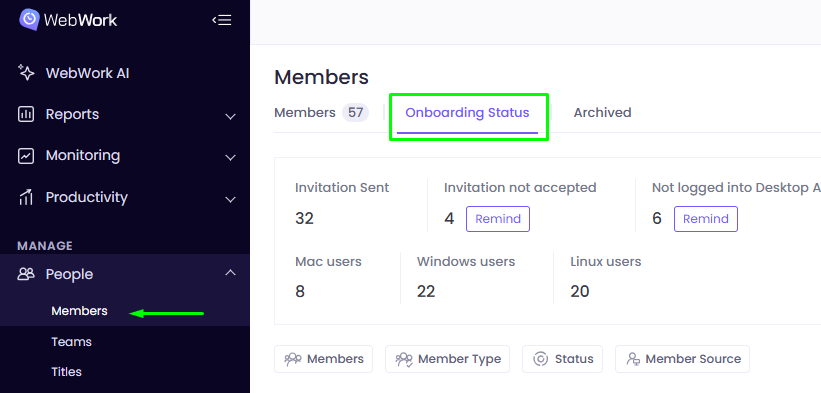
To see if members have installed and started tracking time, go to People > Members > Onboarding Status.
Was this article helpful?
Thanks for your feedback.