You can create new fields for existing members, projects tasks, or assets and filling in the necessary information setting up their parameters. Hence, you can add custom fields in Members, Projects, Tasks, and Assets sections.
Custom Fields for Members
When you have already successfully invited members you can also add new fields for them. To do this, simply click on the member and go to Custom Fields section. Then click on the plus button next to Create a new field.
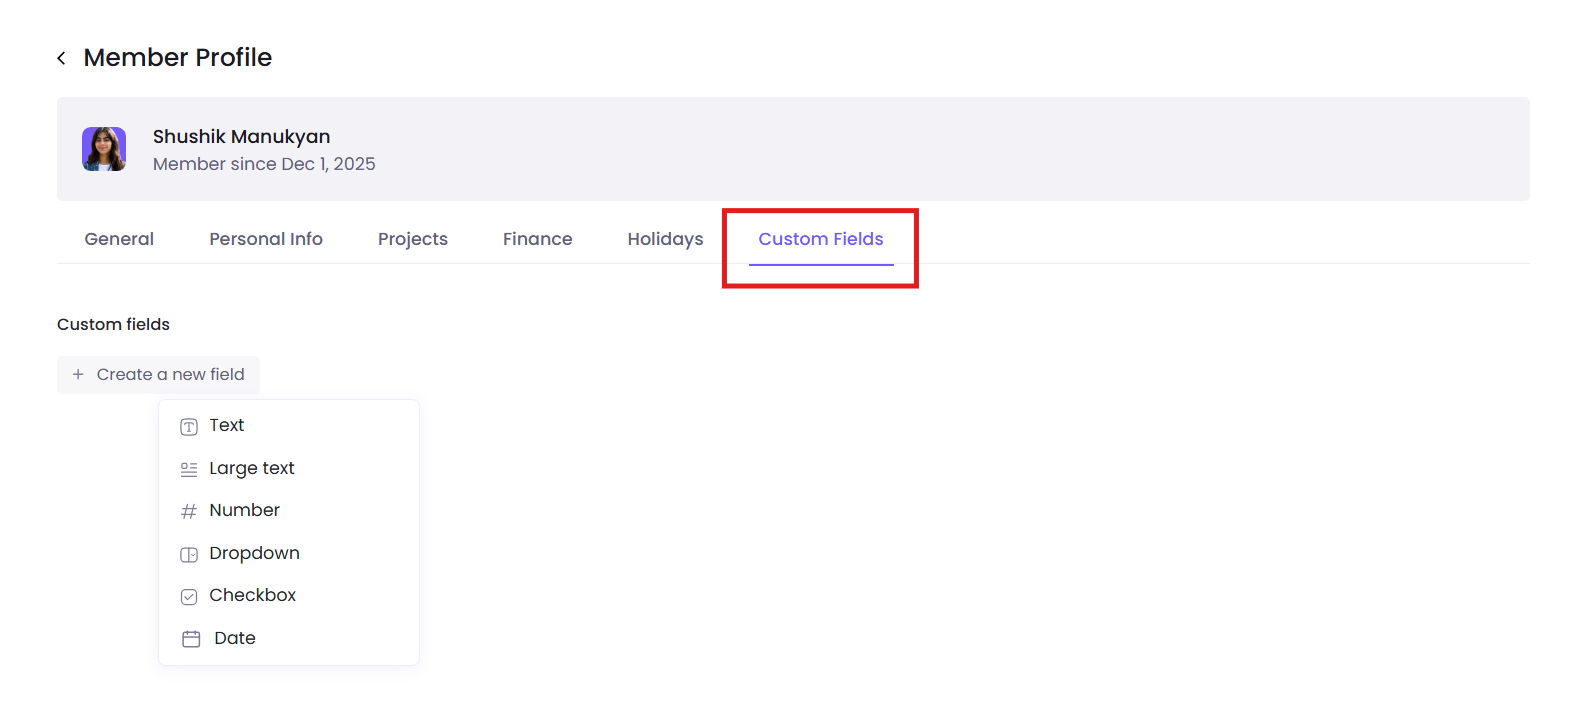
After clicking on it you can decide whether you want the field to be a text field, number, dropdown, or a checkbox. By creating the field it will appear in all the members info panel that exist in your workspace, not just this one specific member.
Custom Fields for Projects
You can also add custom fields for your existing projects, if you feel like it will be necessary to include all the information about the project description in that way. To do that click on Custom Fields, then select the Create a new field button after creating the project and opening its side panel.
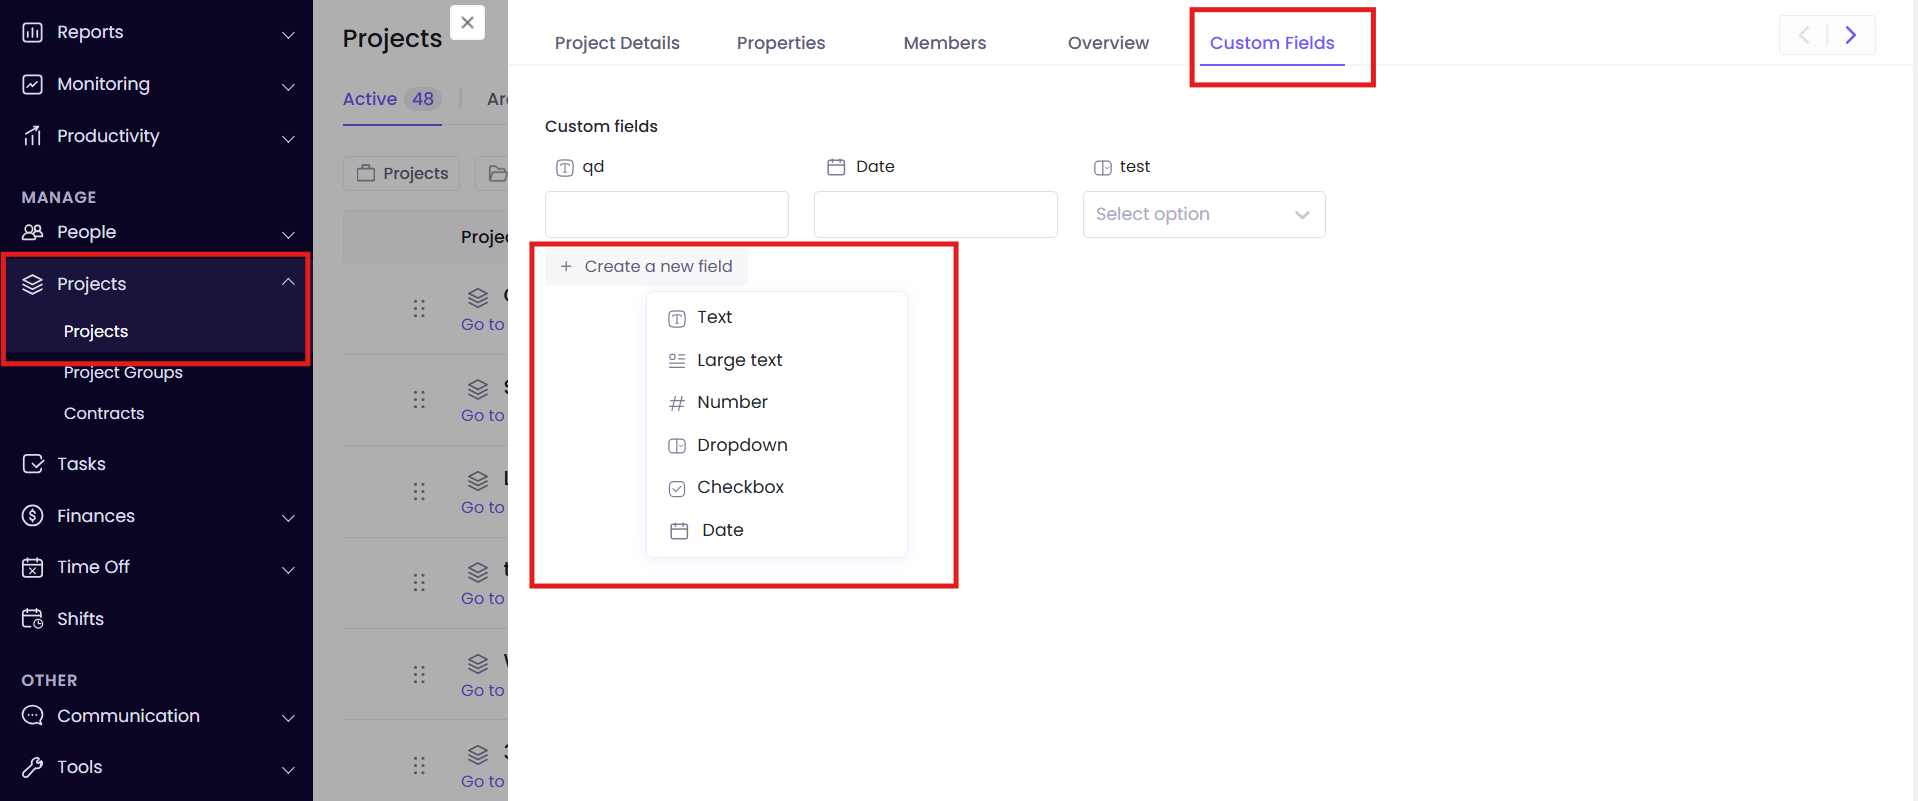
After clicking on it you can decide whether you want the field to be a text field, number, dropdown, or a checkbox. By creating the field it will appear in all the projects that exist in your workspace, not just this one specific project.
Custom Fields for Tasks
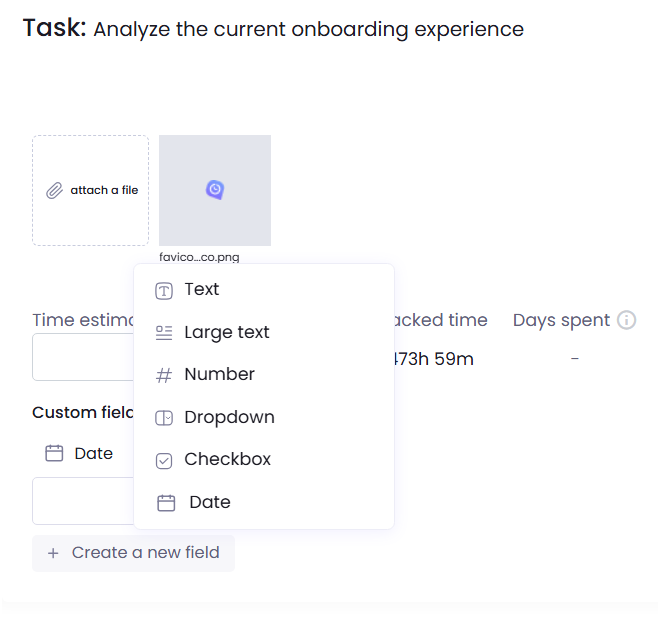
You can add custom fields to your tasks as well. To do that click on the Create a new field button while creating the task.
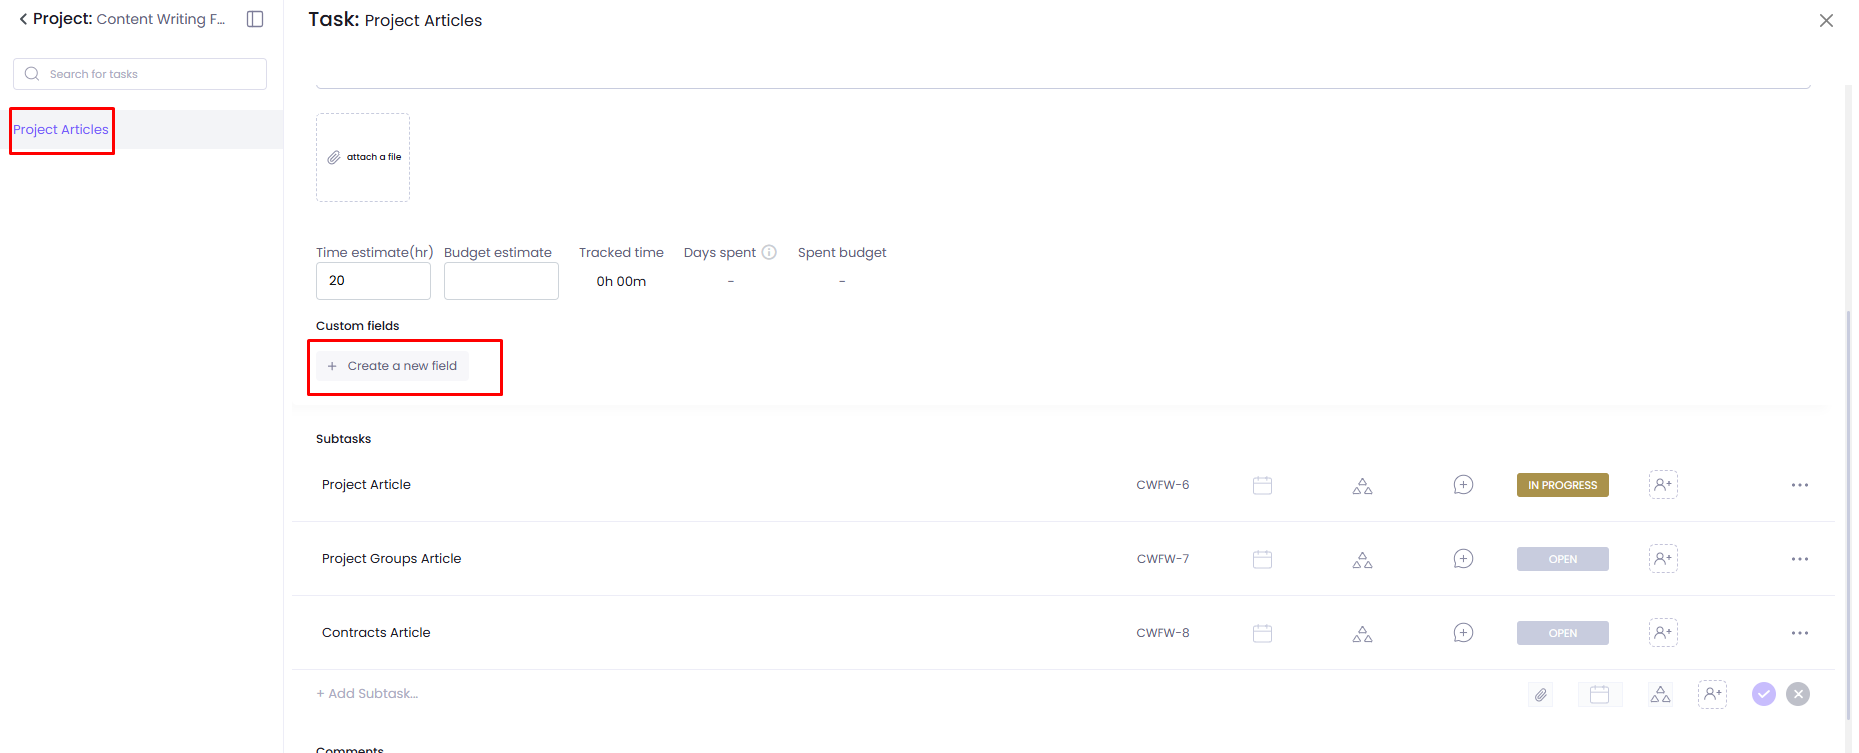
After clicking on it you can decide whether you want the field to be a text field, number, dropdown, or a checkbox. By creating the field it will appear in all the tasks that exist in your workspace, not just this one specific task.
Custom Fields for Assets
Adding custom fields to your assets is also possible. You should go to Tools then click on Assets. When adding an asset and filling the necessary information about that asset you can also create custom fields.

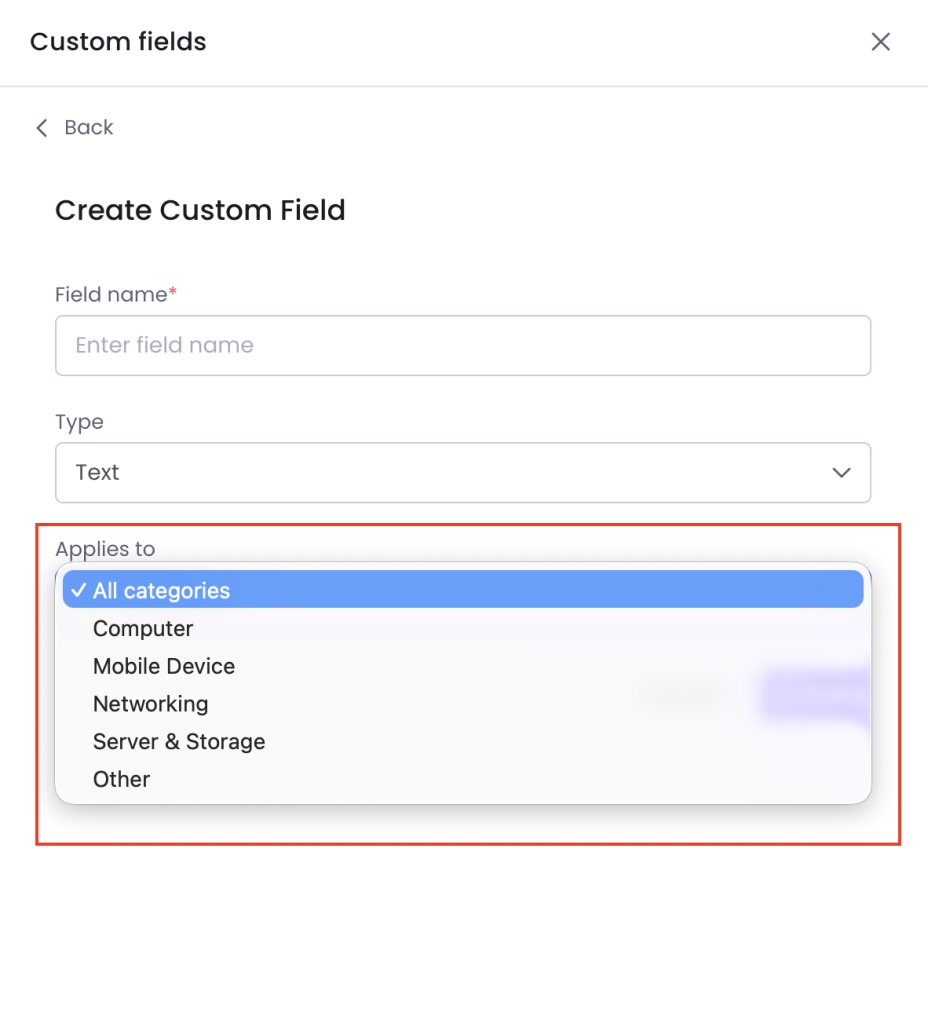
Custom fields can be applied to all asset types or to a specific asset type (e.g., computers only). Keep in mind that once you add a custom field to an asset type, it will appear on every asset of that type across your entire workspace — not just the one you’re currently looking at.
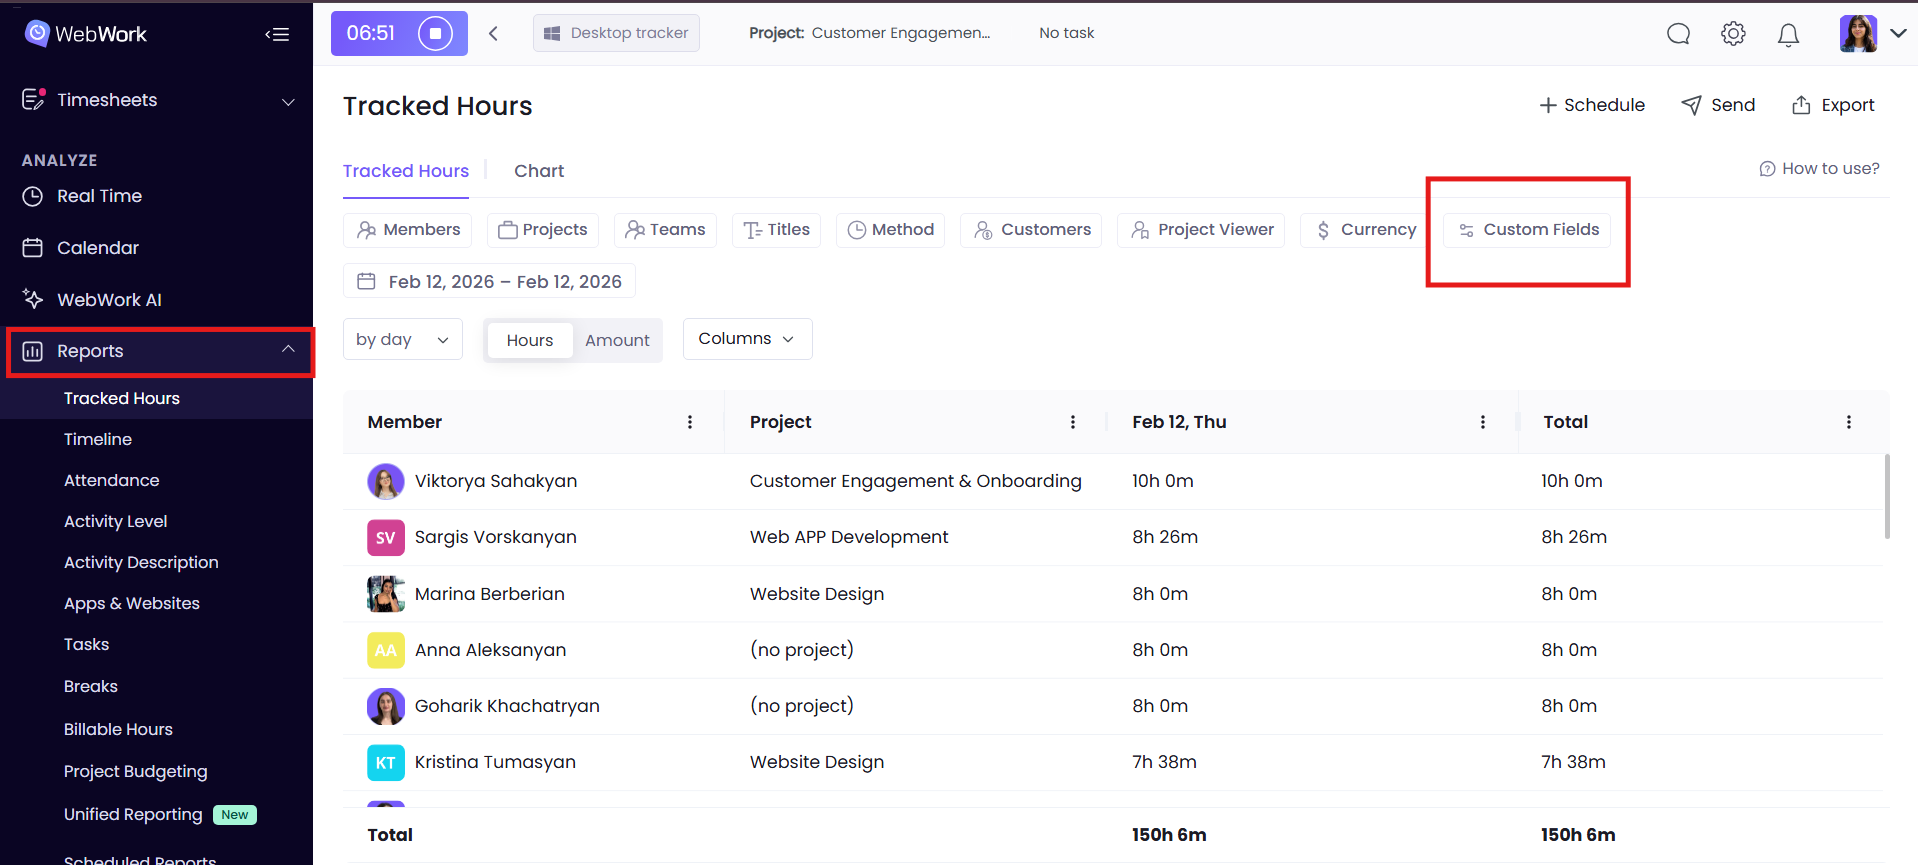
Custom Fields in Reports
You can also see these Custom Fields in all the reports, next to the filters:
Thus, you can also apply filters based on custom fields you have created. Note that only the reports having the Task Column can show custom fields created for tasks too (those are Apps and Websites, Tasks, Billable Hours). For the rest of the reports when clicking on the Custom Fields filter you will have two options: either Member, or Project. Depending on which type of custom fields you have created in Members/Projects/Tasks, you will have the filters accordingly. For example, if you have created a custom field Text for your members, then the filter will look like this:
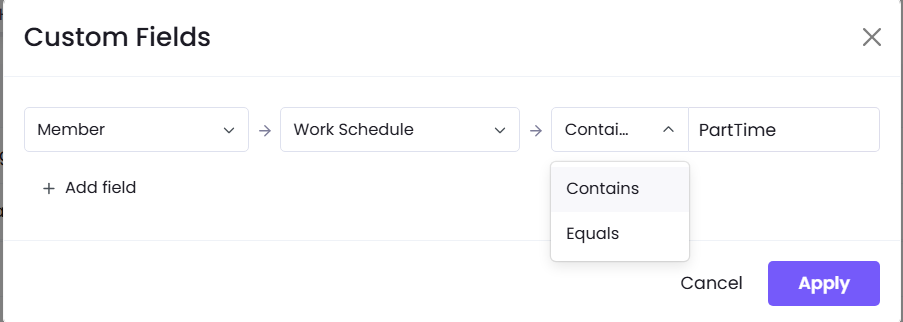
The box which has “Work Schedule” name is the Text Custom Fields created for my members. For texts you can then have options “Contains” or “Equals”. When selecting Equals you should then type the exact text you used when creating the text custom field. In case of Contains, you can write at least one word that the custom field includes. Then you should click Apply, and will see all the members having this specific text in their custom field.
Let’s look at another example. For projects, for instance, this user has created a dropdown custom field with two options. Then, the filter in the reports looks like this:
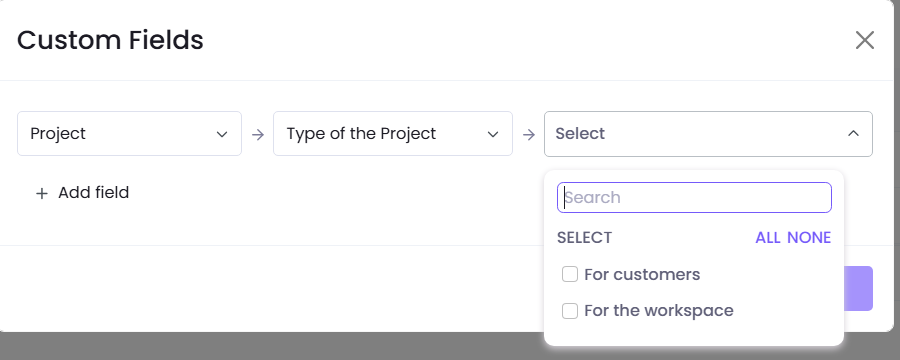
When selecting the option you want, you will then be able to see all the projects that fall under that category.
Was this article helpful?
Thanks for your feedback.